| Voir le sujet précédent :: Voir le sujet suivant |
| Auteur |
Message |
ultralajt
Fidèle Posteur


Inscrit le: 01 Nov 2007

Âge: 66

|
 Posté le: 14/07/2009 19:23 Sujet du message: Posté le: 14/07/2009 19:23 Sujet du message: |
  |
|
|
Today I glue some sheeting of the forward part of the fuselage. The sides bends so much toward the beak, that I was forced to soak balsa in hot water, and dry it while bend it into a curve with hair dryer set to max heat.
I play a bit with canopy formers. First I intend to use 3mm aluminum tubing, but I rather go for a solid 4mm diameter aluminum rods, as they are more stonger, and additional weight is here not so disturbing.
And a picture of today status for you all:
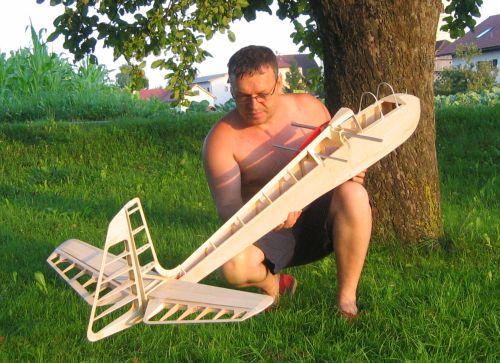
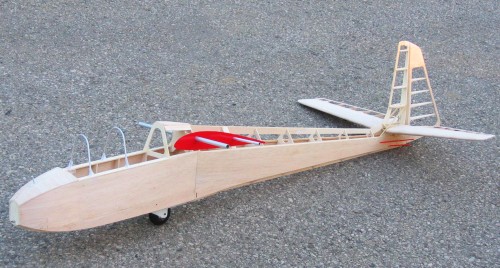
I run out of balsa today and already order a batch. I need a lot of balsa for wing sheeting and ribs. I will have plenty of time to prepare files for ribs cutting, till balsa arrives to my door.
Mitja

Never try, never fail.... |
|
| Revenir en haut de page |
|
 |
ultralajt
Fidèle Posteur


Inscrit le: 01 Nov 2007

Âge: 66

|
 Posté le: 15/07/2009 14:19 Sujet du message: Posté le: 15/07/2009 14:19 Sujet du message: |
  |
|
|
Today I plan to play a little with a beak balsa block, and installation of the permanent part lead weight in the nose.
I intend to laminate a nose skid and made some skid hardware (attachment brackets and bungee start tow hook)
We will see at the evening, if wishes for today build will come truth ![[humm]](images/smiles/humm.gif)
Mitja

Never try, never fail.... |
|
| Revenir en haut de page |
|
 |
ultralajt
Fidèle Posteur


Inscrit le: 01 Nov 2007

Âge: 66

|
 Posté le: 15/07/2009 20:28 Sujet du message: Posté le: 15/07/2009 20:28 Sujet du message: |
  |
|
|
 made and glue on the beak, made form and laminate nose skid, cut rubber shock absorbers and their brackets... cut half of the lead weights from a lead plate. made and glue on the beak, made form and laminate nose skid, cut rubber shock absorbers and their brackets... cut half of the lead weights from a lead plate.
Failed to make bunge start hook.
Photos tomorrow....
Mitja

Never try, never fail.... |
|
| Revenir en haut de page |
|
 |
ultralajt
Fidèle Posteur


Inscrit le: 01 Nov 2007

Âge: 66

|
 Posté le: 16/07/2009 17:22 Sujet du message: Posté le: 16/07/2009 17:22 Sujet du message: |
  |
|
|
Well, again some progress..... 
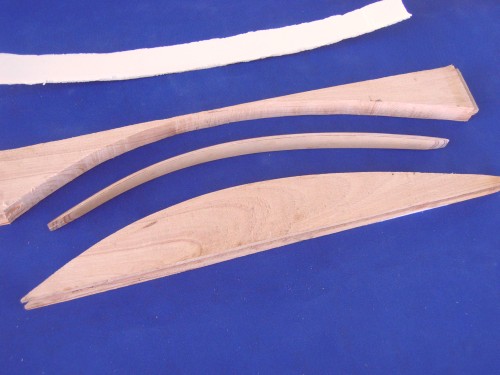
I make landing skid laminating 3 layers of plywood clamped into a fixture made from wood.
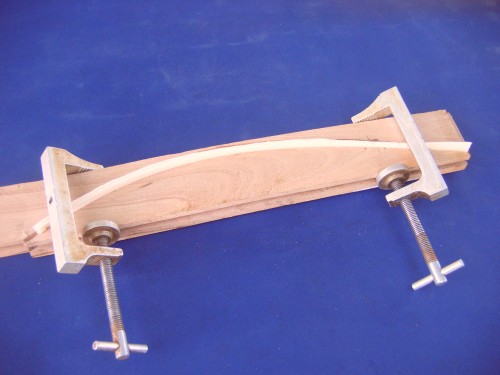
I add a thin strip of styrofoam, to evenly spread the pressure, made by C clamps.
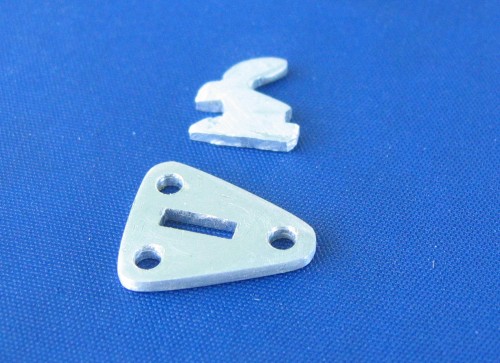
Front end of skid has own bracket, that at same time is a bungee start hook.
I made it from a 2 mm thick aluminum plate. Drill some holes, cut with handsaw and shaped it finally with a small file.
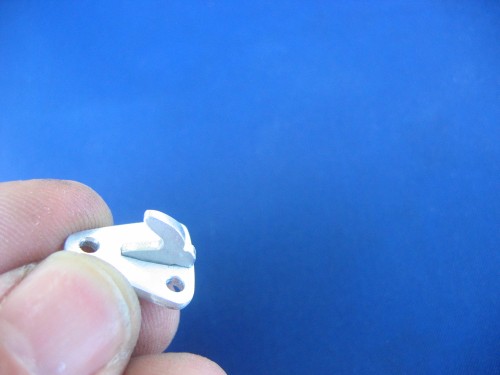
It is so tiny.... 
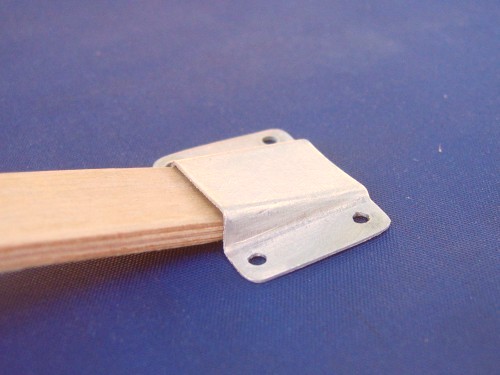
The skid rear bracket allows on landings, that skid can move freely when it is pressed...
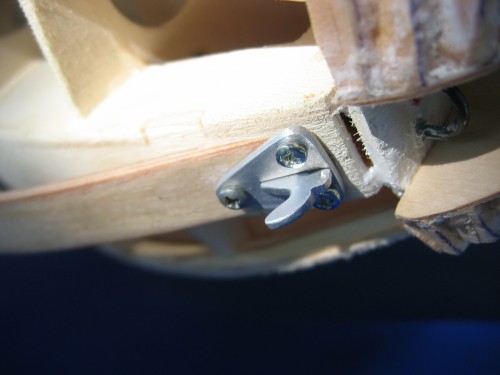
Nose hook and front end of the skid. Stil very messy here at beak end of model...
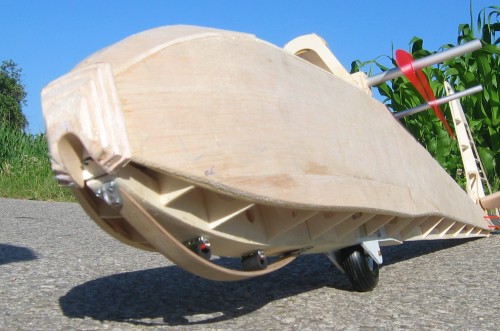
Skid assembled to see how it will look on the model...
Well, that is all for today.
Now I will jump into a pool!  to cool myself ! to cool myself !
Mitja

Never try, never fail....
|
|
| Revenir en haut de page |
|
 |
ultralajt
Fidèle Posteur


Inscrit le: 01 Nov 2007

Âge: 66

|
 Posté le: 18/07/2009 17:56 Sujet du message: Posté le: 18/07/2009 17:56 Sujet du message: |
  |
|
|
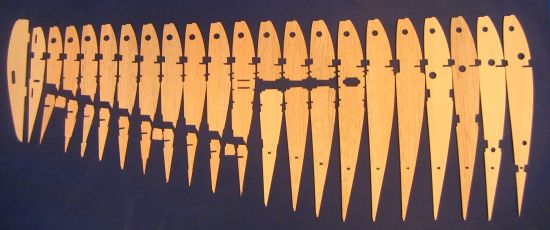
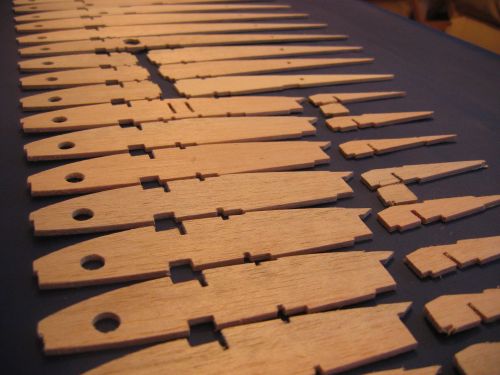
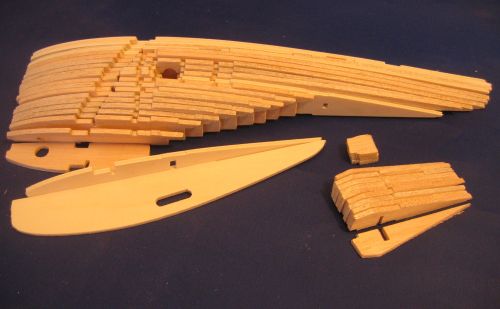
Today I cut ribs for one wing half. Rest I will try to cut tomorrow.
The wing assembly is getting closer and closer.
I must buy a board large enough for the wing assembly. Maybe on monday.
Mitja

Never try, never fail.... |
|
| Revenir en haut de page |
|
 |
ultralajt
Fidèle Posteur


Inscrit le: 01 Nov 2007

Âge: 66

|
 Posté le: 20/07/2009 19:21 Sujet du message: Posté le: 20/07/2009 19:21 Sujet du message: |
  |
|
|
I manage to allmost finished fuselage sheeting. I left bottom sheeting between fuselage formers 1 and 2 open, to install nose lead weight.
I still need to cover the "tricky" part ... radiused transition between fuselage and fin root.
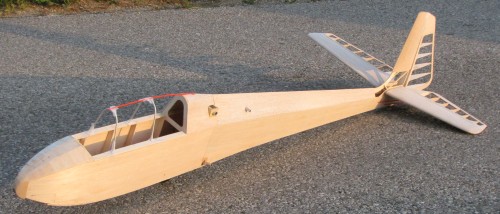
For an intermezzo I carve out for a hard block of beech a tail skid and some brackets from aluminum.
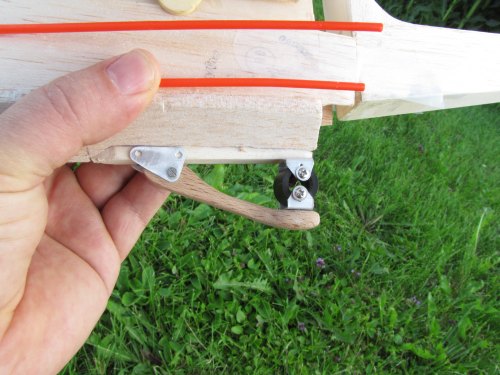
Mitja

Never try, never fail.... |
|
| Revenir en haut de page |
|
 |
caralp_laurent
Psycho Posteur


Inscrit le: 30 Jan 2006

Localisation: La Houssaye en Brie 77
Âge: 53

|
 Posté le: 21/07/2009 07:47 Sujet du message: Posté le: 21/07/2009 07:47 Sujet du message: |
  |
|
|
Hi,
Nice glider, nice work. 
Congratulations.
Lolométéo

Lolométéo, rétro addict ;o)
"On commence à vieillir quand on remplace ses rêves par des regrets"
Sénèque |
|
| Revenir en haut de page |
|
 |
ultralajt
Fidèle Posteur


Inscrit le: 01 Nov 2007

Âge: 66

|
 Posté le: 21/07/2009 07:55 Sujet du message: Posté le: 21/07/2009 07:55 Sujet du message: |
  |
|
|
Thanks!
I like it every day a bit more. We must admit it is an "boxy old crate" but when one starts to look from its tail... specially the cute rudder... thing slowly caught you....
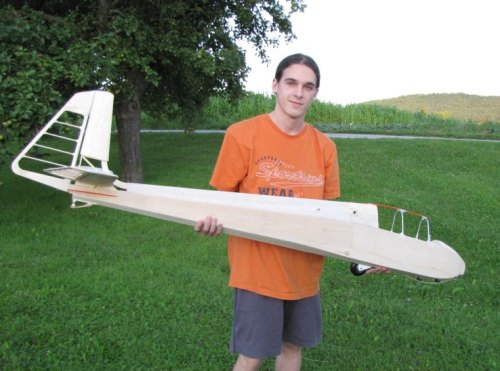
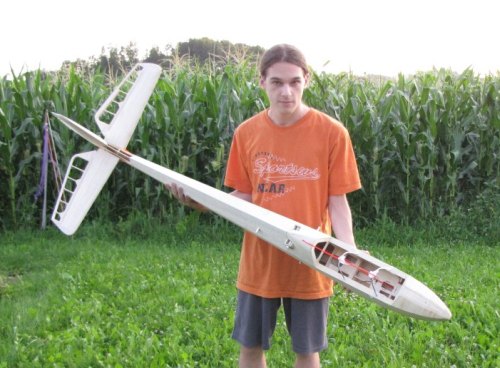
Mitja

Never try, never fail.... |
|
| Revenir en haut de page |
|
 |
plu ronan
Incurable Posteur


Inscrit le: 10 Jan 2007

|
 Posté le: 23/07/2009 20:13 Sujet du message: Posté le: 23/07/2009 20:13 Sujet du message: |
  |
|
|
![[clap]](images/smiles/Clap.gif) ![[clap]](images/smiles/Clap.gif) ![[clap]](images/smiles/Clap.gif)
very good job |
|
| Revenir en haut de page |
|
 |
ultralajt
Fidèle Posteur


Inscrit le: 01 Nov 2007

Âge: 66

|
 Posté le: 26/07/2009 07:27 Sujet du message: Posté le: 26/07/2009 07:27 Sujet du message: |
  |
|
|
Thanks ronan!
Wing (left half) is coming slowly together 
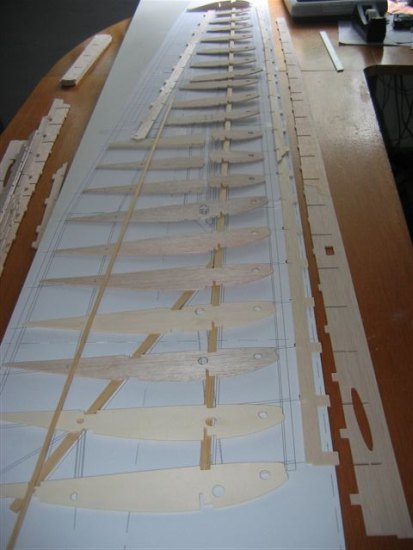
I search for all ribs and place them on their proper places, to minimize risk to put wrong rib on wrong location.
As ypui can see, (on the far right side) a shear web has lenghtvise grain orientation. That is not the best way to use balsa strength. But for the sake of easier wing assembly, I decided to take that approach and use a little thicker balsa to compensate strength. Allso a shear web will be doubled at hi stress area (wing strut attachment location) with plywood doubler.
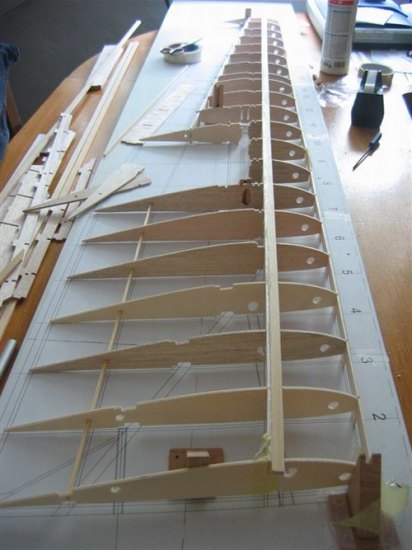
First I assemble shear web with ribs and put on the upper wing spar cap. later I put the lower spar cap, leading edge balsa strip, rear spar at aileron and a spruce longeron trough rear part of the root ribs.
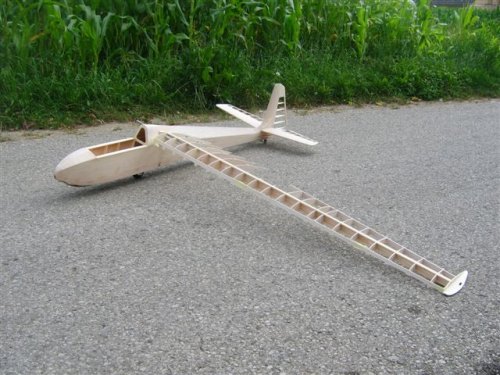
As wing basic structure came out quite stiff, I take it out for a short "photosession" 
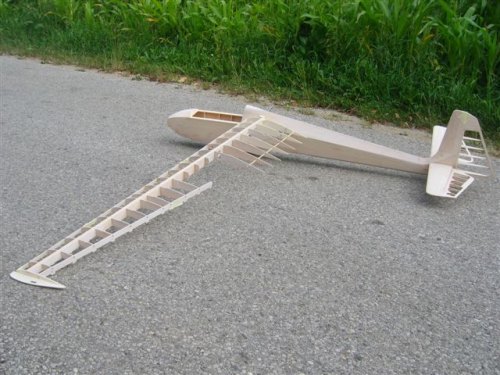
Another view....
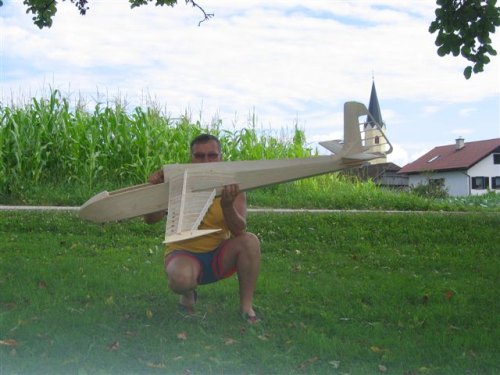
If looking closely, seems that spar is a bit bended, but that is because a section of the wing at air brakes box is still missing, and wing flexes now there elastically. Will be fixed later when brake box, trailing edge will be installed, and sheeting finished.
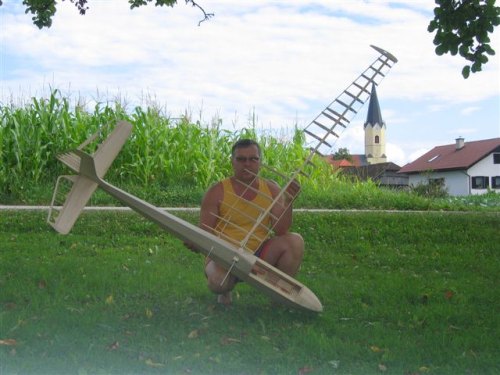
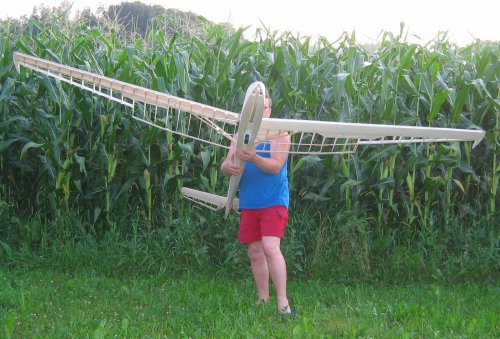
Another view, for a size reference. Boy, I am small! 
I hope, that tomorrow will show you partially sheeted wing. I will start with upper sheeting first.
So much for now!
Have a nice day!
Mitja

Never try, never fail.... |
|
| Revenir en haut de page |
|
 |
ultralajt
Fidèle Posteur


Inscrit le: 01 Nov 2007

Âge: 66

|
 Posté le: 26/07/2009 19:36 Sujet du message: Posté le: 26/07/2009 19:36 Sujet du message: |
  |
|
|
I didnt succeed to make upper D-box sheeting.... 
but it is pretty close.
I ask my daughter to hold Czapla for me to take a photo.
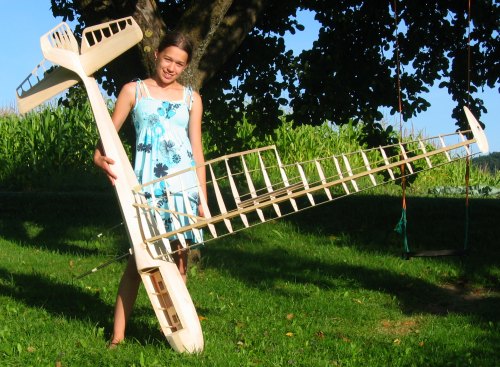
That is all for today!
Mitja

Never try, never fail.... |
|
| Revenir en haut de page |
|
 |
ultralajt
Fidèle Posteur


Inscrit le: 01 Nov 2007

Âge: 66

|
 Posté le: 27/07/2009 17:22 Sujet du message: Posté le: 27/07/2009 17:22 Sujet du message: |
  |
|
|
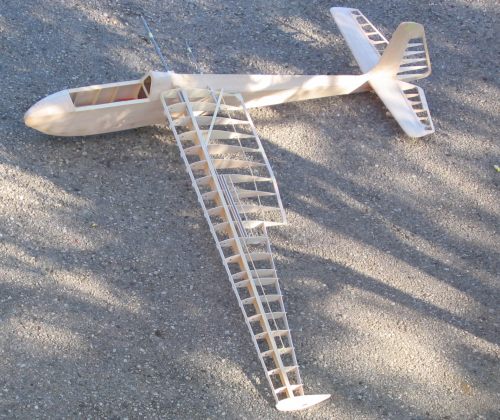
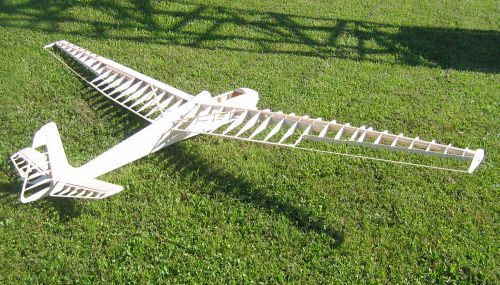
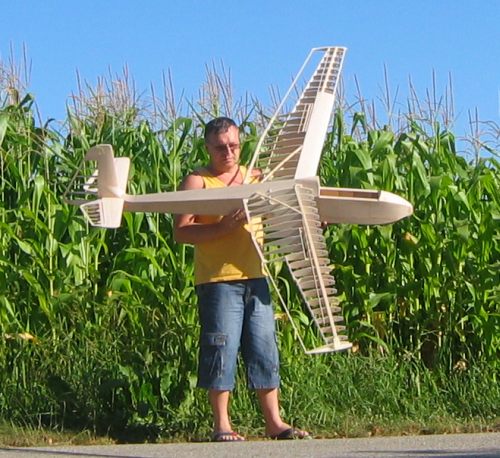
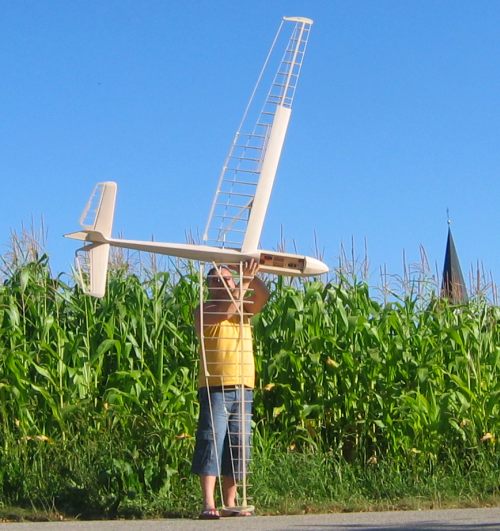
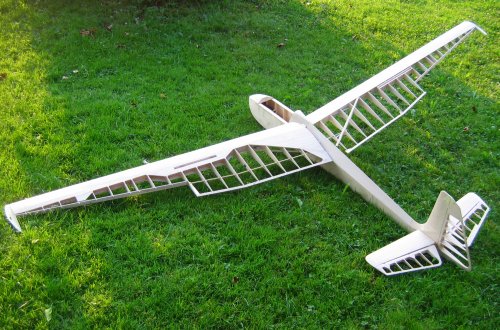
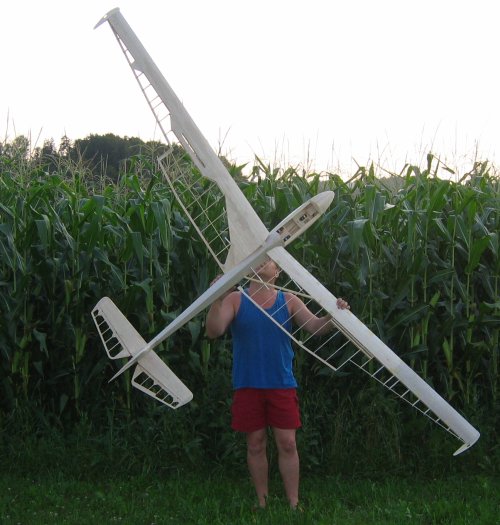
Today afternoon I dry asembled (no use of glue...just press fit parts and some adhesive tape) right half of the wing.
I was courious, how wil sailplane look with both wings on. It is easier now to imagine the size.
This is my first glider larger than 3m.
Enjoy the photos!

Never try, never fail.... |
|
| Revenir en haut de page |
|
 |
Laurent14
Incurable Posteur


Inscrit le: 22 Mai 2006

Localisation: Saint Philbert des Champs Calvados France
|
 Posté le: 27/07/2009 18:01 Sujet du message: Posté le: 27/07/2009 18:01 Sujet du message: |
  |
|
|
It looks like a ASK13.
Great job.


Le bonheur ne vaut d'être vécu que s'il est partagé.
Doucement le matin, pas trop vite le soir. |
|
| Revenir en haut de page |
|
 |
czirh
Accro Posteur


Inscrit le: 21 Fév 2009

Localisation: Bodrum, Turkey
Âge: 63

|
 Posté le: 27/07/2009 18:49 Sujet du message: Posté le: 27/07/2009 18:49 Sujet du message: |
  |
|
|
Beautiful project .. 

Cem Zırh
Fafnir |
|
| Revenir en haut de page |
|
 |
ultralajt
Fidèle Posteur


Inscrit le: 01 Nov 2007

Âge: 66

|
 Posté le: 29/07/2009 06:04 Sujet du message: Posté le: 29/07/2009 06:04 Sujet du message: |
  |
|
|
Hi!
Yesterday I was not so hardworking. Wings status quo....
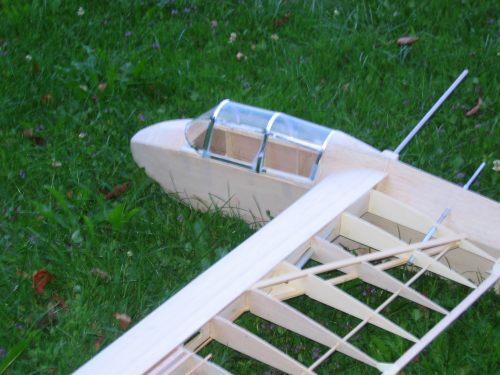
But i play a bit with a mockup of the canopy. I cut two plastic Cola bottles and using some silver adhesive tape make a mockup of the cockpit, just to se how the model will look with a cabin.
The real canopy will of course need much more work.
I am hoping, that today afternoon will make some more sheeting on the left wing.....

Never try, never fail.... |
|
| Revenir en haut de page |
|
 |
ultralajt
Fidèle Posteur


Inscrit le: 01 Nov 2007

Âge: 66

|
 Posté le: 01/08/2009 20:43 Sujet du message: Posté le: 01/08/2009 20:43 Sujet du message: |
  |
|
|
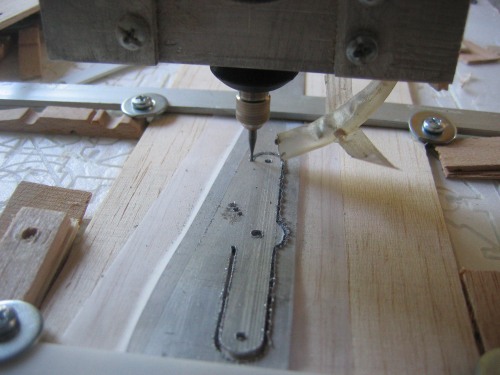
I made speed brakes today.
I take a deep breath, set cutting speed to 0,2mm/s and cut aluminum brackets (levers) for a brakes:
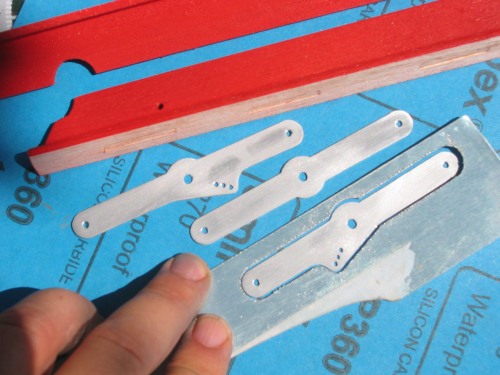
After a brief cleaning of aluminum parts with a small file and sandpaper, parts looks better than I ecpected:
Then I asembled parts to see how it works:
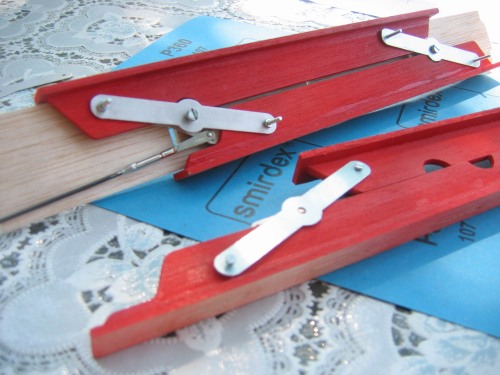
And it works just lake that (see a video):
http://www.youtube.com/watch?v=QIGucqdL2-g
Tomorrow I will continue with left wing sheeting.
Mitja

Never try, never fail.... |
|
| Revenir en haut de page |
|
 |
ultralajt
Fidèle Posteur


Inscrit le: 01 Nov 2007

Âge: 66

|
|
| Revenir en haut de page |
|
 |
ultralajt
Fidèle Posteur


Inscrit le: 01 Nov 2007

Âge: 66

|
 Posté le: 03/08/2009 06:23 Sujet du message: Posté le: 03/08/2009 06:23 Sujet du message: |
  |
|
|
Over the night a bottom sheeting was clamped into place. Now allmost all sheetings are in place (except triangle at root between main and diagonal spar and some strips (caps) at rear spar in aileron area.
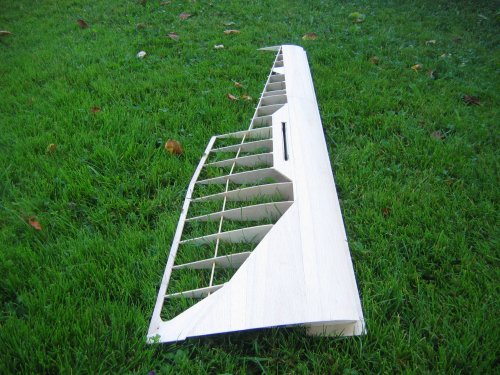
Upper side.
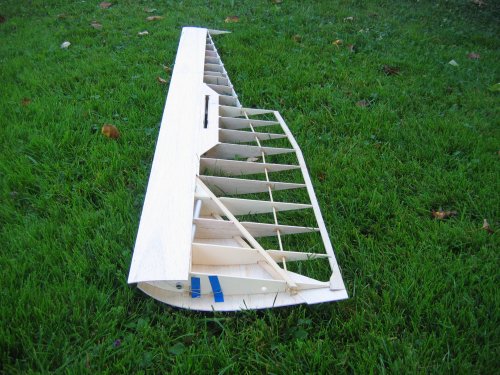
Bottom side.
Mitja

Never try, never fail.... |
|
| Revenir en haut de page |
|
 |
mat2verre
Maniaco Posteur

Inscrit le: 17 Juil 2006

Localisation: IDF
|
 Posté le: 03/08/2009 21:46 Sujet du message: Posté le: 03/08/2009 21:46 Sujet du message: |
  |
|
|
Congratulations, you've done a very nice work on your airbrakes.
Is there any lock system when they are closed?
Mat

Des projets plein la tête... |
|
| Revenir en haut de page |
|
 |
ultralajt
Fidèle Posteur


Inscrit le: 01 Nov 2007

Âge: 66

|
|
| Revenir en haut de page |
|
 |
ultralajt
Fidèle Posteur


Inscrit le: 01 Nov 2007

Âge: 66

|
 Posté le: 05/08/2009 19:06 Sujet du message: Posté le: 05/08/2009 19:06 Sujet du message: |
  |
|
|
Some work on another wing.
A brief photo report of the current status:
Mitja

Never try, never fail.... |
|
| Revenir en haut de page |
|
 |
ultralajt
Fidèle Posteur


Inscrit le: 01 Nov 2007

Âge: 66

|
 Posté le: 09/08/2009 20:50 Sujet du message: Posté le: 09/08/2009 20:50 Sujet du message: |
  |
|
|
Today I finished left wing leading edge.
I use a newly made sanding block and plywood nose airfoil section templates.
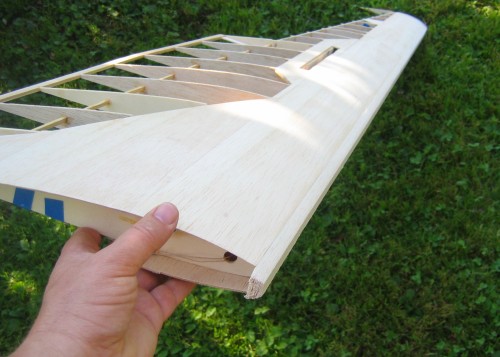
Nose balsa strip glued and roughly carved tangential to the nose skin.
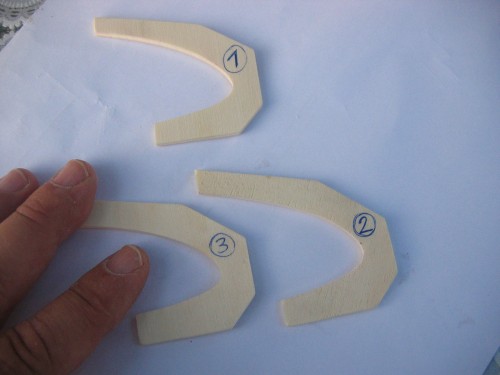
Templates for checking the leading edge.
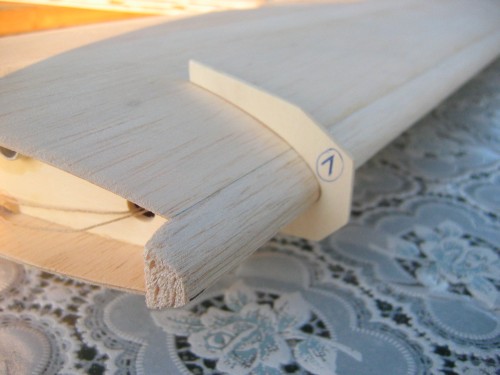
Checking the contour with a template.
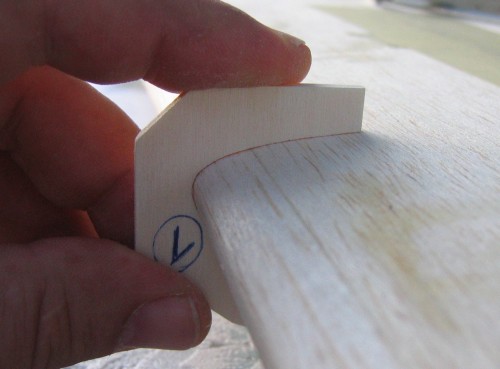
Checking the bottom side of airfoil nose shape.
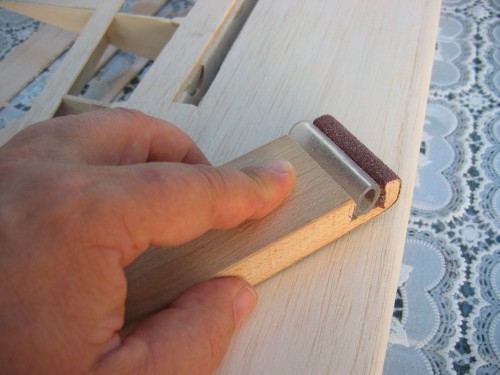
Sanding block. Hardwood and plastic tube in the groove...easy to made and easy to change the sanding paper.
Mitja

Never try, never fail.... |
|
| Revenir en haut de page |
|
 |
ultralajt
Fidèle Posteur


Inscrit le: 01 Nov 2007

Âge: 66

|
 Posté le: 13/08/2009 12:00 Sujet du message: Posté le: 13/08/2009 12:00 Sujet du message: |
  |
|
|
The other half (right) of the wing is near to the finish....
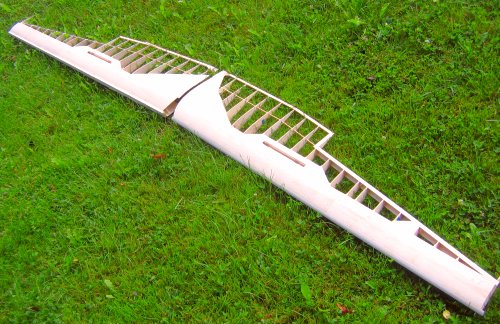
Mitja

Never try, never fail.... |
|
| Revenir en haut de page |
|
 |
ultralajt
Fidèle Posteur


Inscrit le: 01 Nov 2007

Âge: 66

|
 Posté le: 13/08/2009 20:11 Sujet du message: Posté le: 13/08/2009 20:11 Sujet du message: |
  |
|
|
Right aileron nearly finished.... 
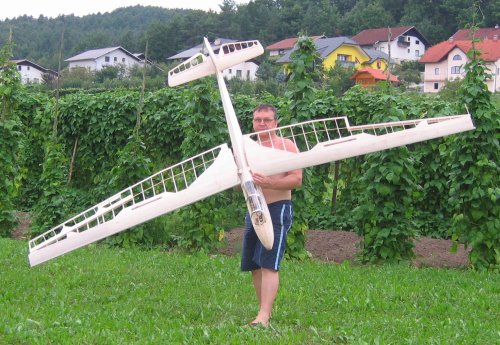
Mitja

Never try, never fail.... |
|
| Revenir en haut de page |
|
 |
plu ronan
Incurable Posteur


Inscrit le: 10 Jan 2007

|
 Posté le: 18/08/2009 20:15 Sujet du message: Posté le: 18/08/2009 20:15 Sujet du message: |
  |
|
|
good job  |
|
| Revenir en haut de page |
|
 |
ultralajt
Fidèle Posteur


Inscrit le: 01 Nov 2007

Âge: 66

|
 Posté le: 26/08/2009 15:55 Sujet du message: Posté le: 26/08/2009 15:55 Sujet du message: |
  |
|
|
Holidays are over.....
Leaving the paradise... 
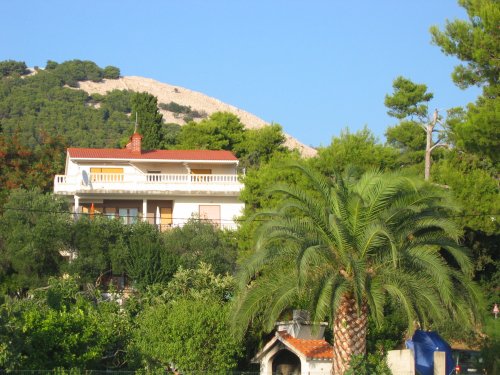
Well, back to my workshop! ![[bave]](images/smiles/bave.gif)
Czapla is waiting to be finished......

Never try, never fail.... |
|
| Revenir en haut de page |
|
 |
ultralajt
Fidèle Posteur


Inscrit le: 01 Nov 2007

Âge: 66

|
 Posté le: 28/08/2009 22:47 Sujet du message: Posté le: 28/08/2009 22:47 Sujet du message: |
  |
|
|
Today (oops..yesterday already!) I work on the wings. I finished wing tips and cut root sheeting to align with fuselage.
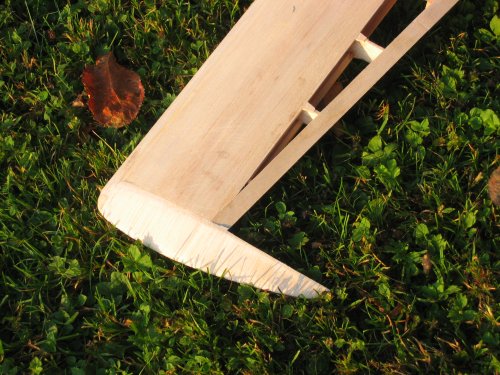
Wing tip. Need some more sanding, but roughly it is finished.
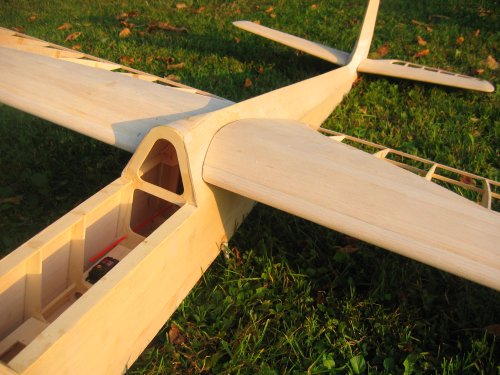
Wing root/fuselage joint. Also need some sanding, but roughly finished.
Tomorrow I plan to finish ailerons and starts with a canopy.....
Mitja

Never try, never fail.... |
|
| Revenir en haut de page |
|
 |
ultralajt
Fidèle Posteur


Inscrit le: 01 Nov 2007

Âge: 66

|
 Posté le: 30/08/2009 08:53 Sujet du message: Posté le: 30/08/2009 08:53 Sujet du message: |
  |
|
|
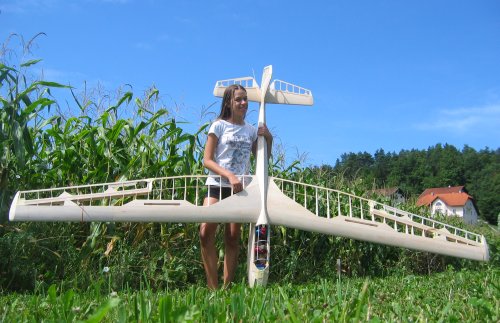
Yesterday I finished wings and gone halfway into last aileron.
Today I continue with a canopy frame. I made glue joints that are reinforced with a sewing thread and soaked with CA. I will cover joints with some more glue and paint silver to look as welding joints.
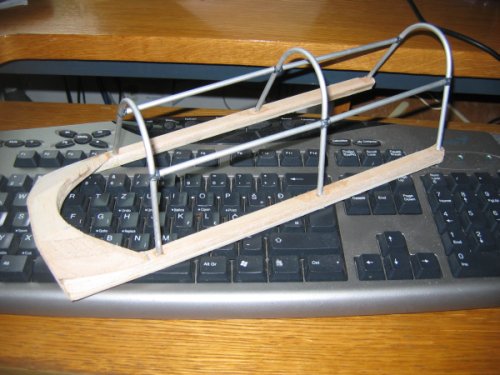
At this moment, model is very very close to ARC stage...
Mitja

Never try, never fail.... |
|
| Revenir en haut de page |
|
 |
ultralajt
Fidèle Posteur


Inscrit le: 01 Nov 2007

Âge: 66

|
 Posté le: 07/09/2009 05:39 Sujet du message: Posté le: 07/09/2009 05:39 Sujet du message: |
  |
|
|
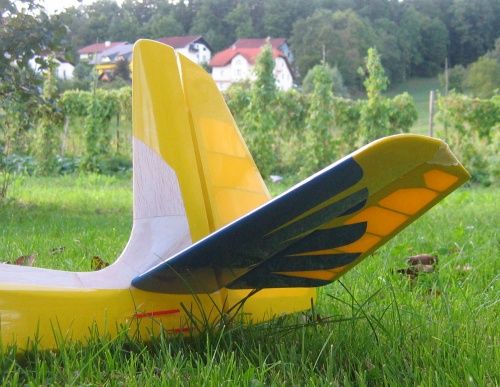
Covering of the model on the way!
Mitja

Never try, never fail.... |
|
| Revenir en haut de page |
|
 |
ultralajt
Fidèle Posteur


Inscrit le: 01 Nov 2007

Âge: 66

|
 Posté le: 08/09/2009 08:08 Sujet du message: Posté le: 08/09/2009 08:08 Sujet du message: |
  |
|
|
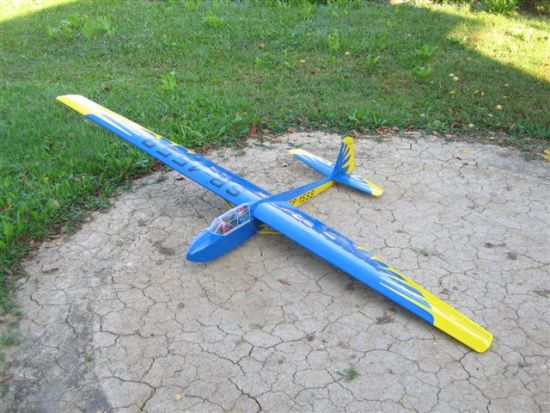
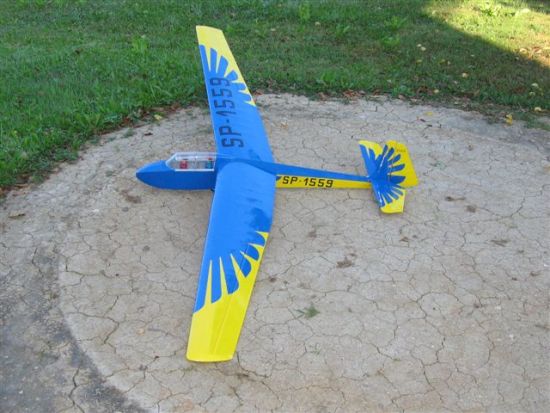
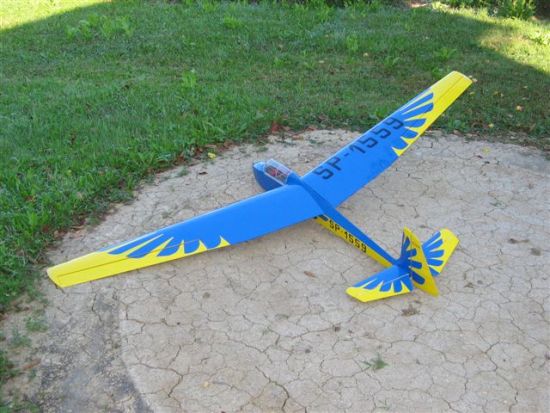
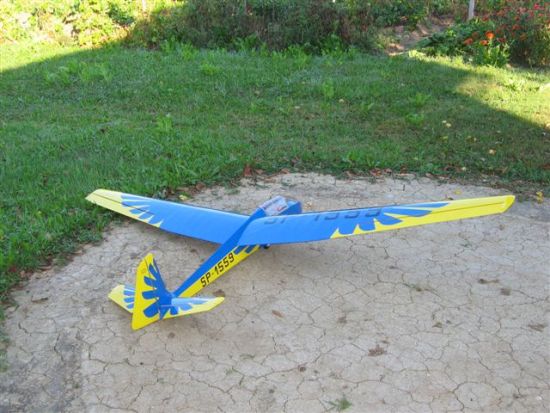
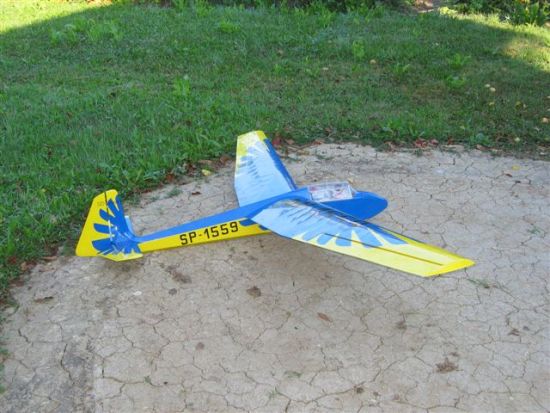
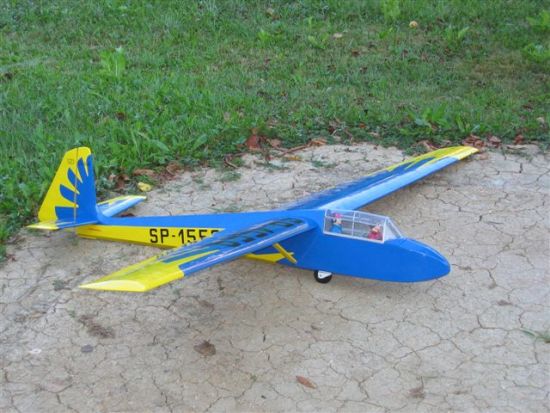
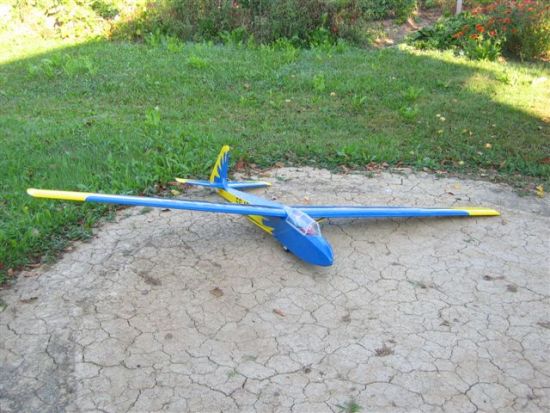
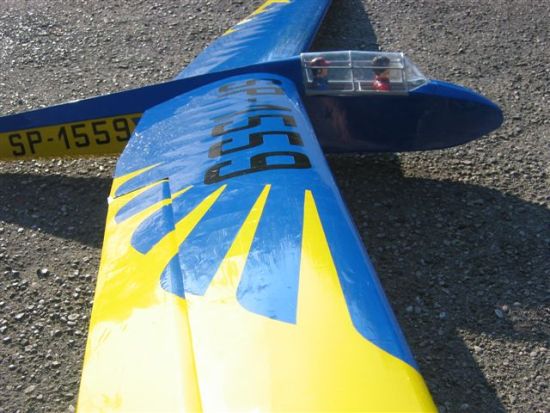
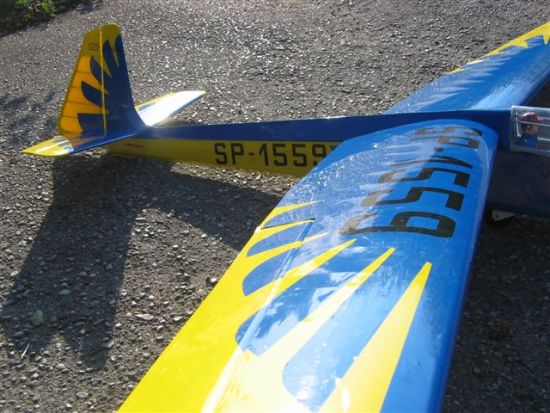
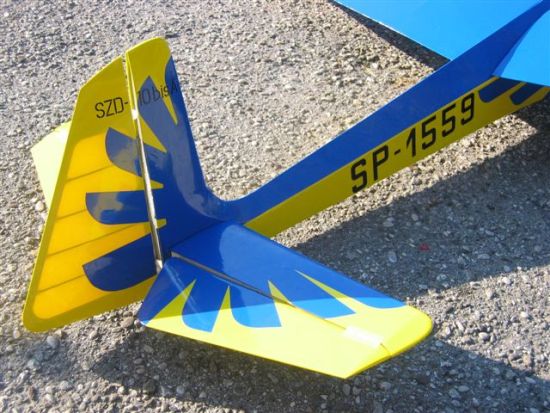
And at last, covering is finished. I need to puncture some air bubbles that are trapped between two covering films, but that wil not be a problem.

Never try, never fail.... |
|
| Revenir en haut de page |
|
 |
|

