| Voir le sujet précédent :: Voir le sujet suivant |
| Auteur |
Message |
bocorvin
Maniaco Posteur


Inscrit le: 17 Aoû 2015

Localisation: Hillegom
Âge: 79

|
 Posté le: 08/06/2019 13:53 Sujet du message: Slingsby Gull scale 1/4 Posté le: 08/06/2019 13:53 Sujet du message: Slingsby Gull scale 1/4 |
  |
|
|
Hello everybody,
After finishing a new fuselage for my Nemere 1/8 I started thinking about a new glider. First I wanted to build a Fokker FG 1, but that is very similar to the FG 2 that I had already built. Besides I like the period of varnished ply gliders! A fellow modeller mentioned the beautiful Fafnir. I talked about the flying characteristics of the vintage gliders. Because I do almost all my flying on flat fields, not on a slope (not much slope in Holland..) I realised that the thermal qualities are much more important. I thought building the wonderful Petrel, almost started with the frames when I realised that it has also a thick wing profile which cannot be changed without changing the “looks” of this glider. Luckily I found the Slingsby Gull,and a much thinner wing, but with struts. A development was the “cantilever” Gull, with a stronger wing (not thicker) and without struts. Fortunatly it has also spoilers, a great help for me with landings!
If I build this glider in scale 1/4 it has a span of practically 4 metres, which suits me well, with a relatively short fuselage, luckily in varnished ply. Also I wanted to build it light, hoping it will fly better .
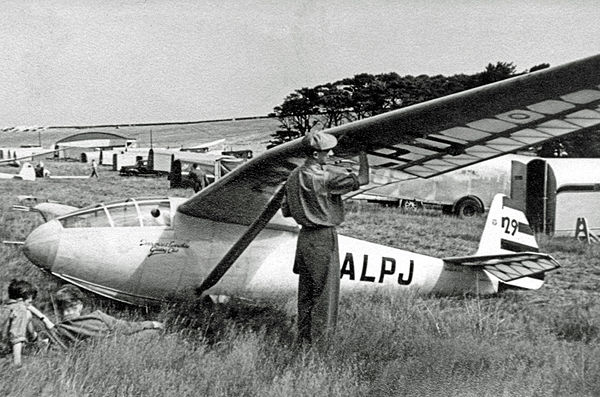

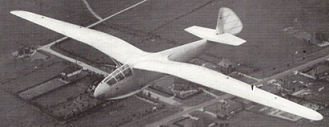
I found a great drawing in the Martin Simons book about Slingsby. ;
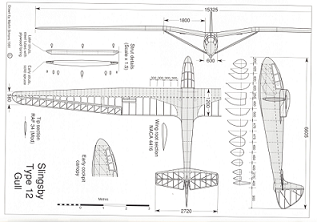
The scale soaring Uk has also very usefull documentation 
Because I (still?) can’t work with digital drawing programs I enlarged his drawing. The nasty thing is that the lines are also enlarged, so the frame plans are rather crude. In this case I started without a detailed plan, I just work from the original plans, often to find solutions while working. I also plan to make the fuselage with as few girders as possible. With good butted joints the ply should take all the loads. I tried that on a new fuselage of my Nemere 1 / 8,
http://www.retroplane.net/forum/viewtopic.php?t=4632 end of page 1, which seemed to work well.

The enlarged drawing of the fuselage.
So I started with the frames, I laminated them from 7 layers 1 X 5 mm spruce, dry bended, clamped and glued with thin cyano.
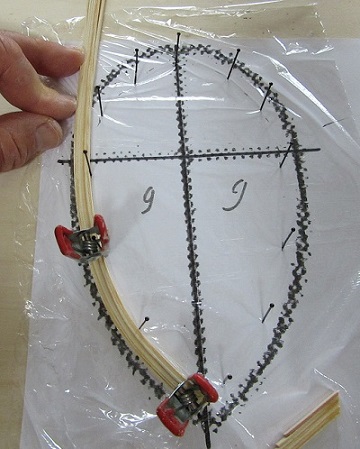
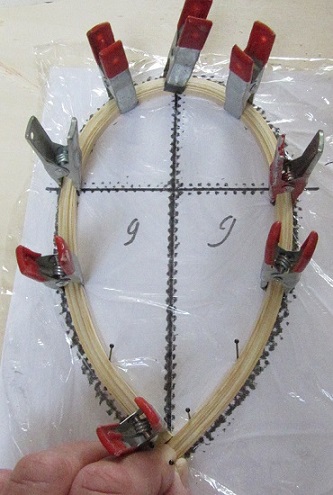
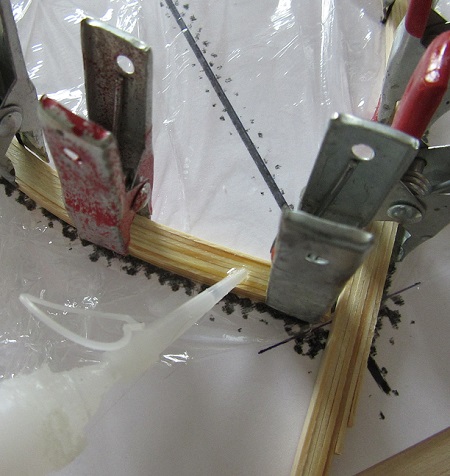
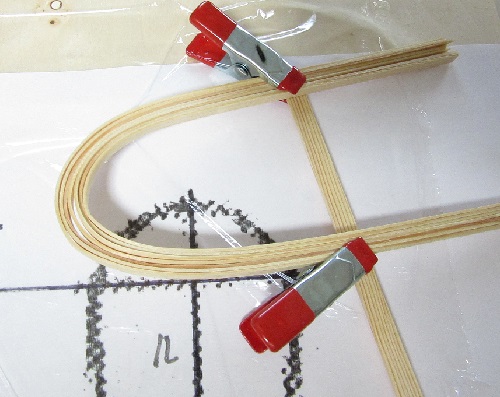
For the narrower frames I pre bended the spruce battens with boiling water and let them dry before laminating.

Next I made a building jig from a piece 20mm chipboard. 10 X 10 mm spruce battens screwed at a small angle on it on which later the frames are glued temporarely. So the frames are placed at that small angle, just as the plan, to achive the correct joints of the ply panels later. Because the inaccuracy of vthe frames it took some time to line it all up. Luckily its easy to thicken a frame with an extra 1mm batten. I sanded this setup with a long sanding block to get all the humps out. I had to remake one frames but in the end I was quite pleased with the result.
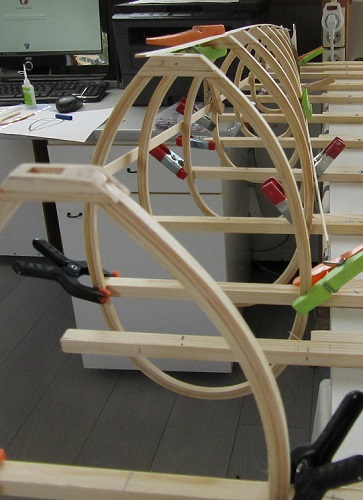
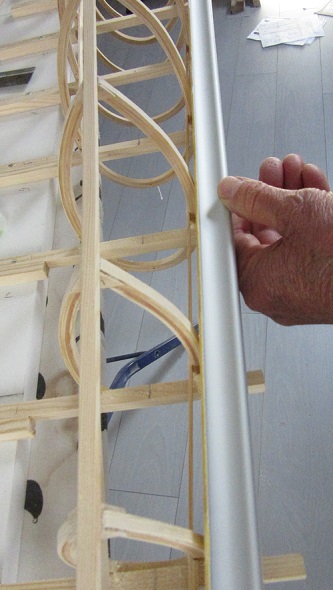
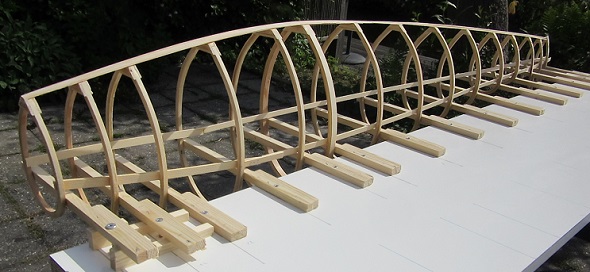
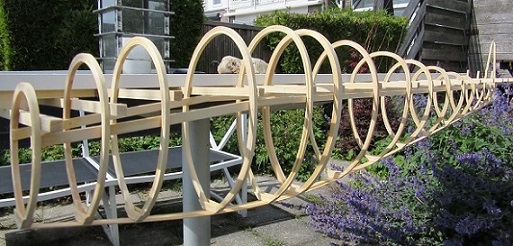
The batten on the inside of the frames will form a "sandwich " girder with the strip of the buttjoint of the skin panels (from 0.6mm ply)
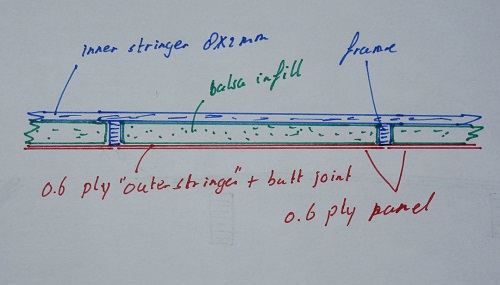
Hopefully this scetch explains my intention!
To be continued
Vincent
|
|
| Revenir en haut de page |
|
 |
Johannes
Serial Posteur


Inscrit le: 23 Juil 2007

Localisation: Leichlingen
Âge: 66

|
 Posté le: 08/06/2019 15:38 Sujet du message: Posté le: 08/06/2019 15:38 Sujet du message: |
  |
|
|
Hi Vincent,
schön das du wieder was baust 
Die Konstruktion der Spanten gefällt mir sehr gut ![[good]](images/smiles/good.gif)
Gruß Johannes


|
|
| Revenir en haut de page |
|
 |
bocorvin
Maniaco Posteur


Inscrit le: 17 Aoû 2015

Localisation: Hillegom
Âge: 79

|
 Posté le: 08/06/2019 21:49 Sujet du message: Posté le: 08/06/2019 21:49 Sujet du message: |
  |
|
|
Hallo Johannes,
Danke, erst komt noch Ferien, dann sperrholz und dann gehts weiter 
Gruss, Vincent |
|
| Revenir en haut de page |
|
 |
caralp_laurent
Psycho Posteur


Inscrit le: 30 Jan 2006

Localisation: La Houssaye en Brie 77
Âge: 53

|
 Posté le: 09/06/2019 09:42 Sujet du message: Posté le: 09/06/2019 09:42 Sujet du message: |
  |
|
|
Hello Vincent,
It's a magnificent glider ! So you're building the Gull III without struts ant with brakes ? (I know one real sized Gull III still survives in GB, painted in blue and translucid).
I like your building method, (looks like mine  , neither do I the drawings "computer made") , neither do I the drawings "computer made")
It will work and fly the same anyway ![[clap]](images/smiles/Clap.gif) ![[clap]](images/smiles/Clap.gif) ![[clap]](images/smiles/Clap.gif)
Have a good building, see you,
Friendly,
Lolo

Lolométéo, rétro addict ;o)
"On commence à vieillir quand on remplace ses rêves par des regrets"
Sénèque |
|
| Revenir en haut de page |
|
 |
bocorvin
Maniaco Posteur


Inscrit le: 17 Aoû 2015

Localisation: Hillegom
Âge: 79

|
 Posté le: 09/06/2019 12:22 Sujet du message: Posté le: 09/06/2019 12:22 Sujet du message: |
  |
|
|
Hello Lolo,
Thanks for your remarks  and yes I build it with brakes and probably without struts. I hope to see the real one in Scotland soon. and yes I build it with brakes and probably without struts. I hope to see the real one in Scotland soon.
Glad you like my building method 
Amicalement,
Vincent |
|
| Revenir en haut de page |
|
 |
Peter64
Maniaco Posteur


Inscrit le: 17 Oct 2007

Localisation: Kärnten
Âge: 61

|
 Posté le: 09/06/2019 21:48 Sujet du message: Posté le: 09/06/2019 21:48 Sujet du message: |
  |
|
|
Servus Vincent 
bin schon gespannt auf deinen Bericht.
Viel Spaß beim Bauen ![[clap]](images/smiles/Clap.gif) . .
Liebe Grüße Peter |
|
| Revenir en haut de page |
|
 |
bocorvin
Maniaco Posteur


Inscrit le: 17 Aoû 2015

Localisation: Hillegom
Âge: 79

|
 Posté le: 10/06/2019 18:18 Sujet du message: Posté le: 10/06/2019 18:18 Sujet du message: |
  |
|
|
Danke Peter  , ,
Wir haben erst Ferien, soll eben dauern for Ich weiter bastel ![[scie]](images/smiles/scie.gif) ![[scie]](images/smiles/scie.gif) . .
LG Vincent |
|
| Revenir en haut de page |
|
 |
Clifton
Psycho Posteur


Inscrit le: 06 Mai 2014

Localisation: Anjou
Âge: 63

|
 Posté le: 10/06/2019 20:06 Sujet du message: Posté le: 10/06/2019 20:06 Sujet du message: |
  |
|
|
Hello Vincent,
Very nice choice. I love this sailplane. I like your kind of building but I can't do that. It's terrific for me not having a good plan.
I'll follow your build with lot of interest.
Philippe

Slingsby Petrel, à mon gout le plus beau de tous, quoi que le Fafnir ... Ah ces ailes en mouette, un jour ....
Rien de ce qui est fini n'est jamais achevé tant que tout ce qui est commencé n'est pas totalement terminé (Pierre Dac) |
|
| Revenir en haut de page |
|
 |
bocorvin
Maniaco Posteur


Inscrit le: 17 Aoû 2015

Localisation: Hillegom
Âge: 79

|
 Posté le: 10/06/2019 20:58 Sujet du message: Posté le: 10/06/2019 20:58 Sujet du message: |
  |
|
|
Hello Philippe,
Glad that you like this plane!
I can't make digital plans, I make a kind of plan in my head and I am to lazy to work that out in detail.
Hopefully the construction idea of the fuselage works out OK.
Vincent |
|
| Revenir en haut de page |
|
 |
bocorvin
Maniaco Posteur


Inscrit le: 17 Aoû 2015

Localisation: Hillegom
Âge: 79

|
 Posté le: 19/07/2019 13:29 Sujet du message: Posté le: 19/07/2019 13:29 Sujet du message: |
  |
|
|
Hello everyone,
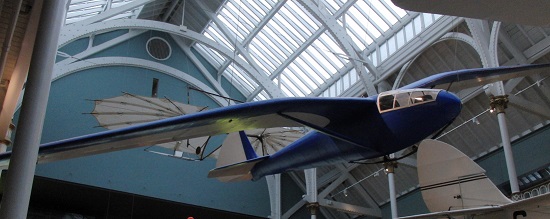
We went to Scotland this spring and my friend Rob found out that a Slingsby Gull was exhibited in the National Museum of Scotland, Edinburgh, what a coincidence  . First time I could actually see the real thing before making it! Because the Gull was suspended onder a glass roof, it was difficult to make good shots, but I could figure out quite some details. . First time I could actually see the real thing before making it! Because the Gull was suspended onder a glass roof, it was difficult to make good shots, but I could figure out quite some details.
.
Back at home I went on, made the main spar of the fin,
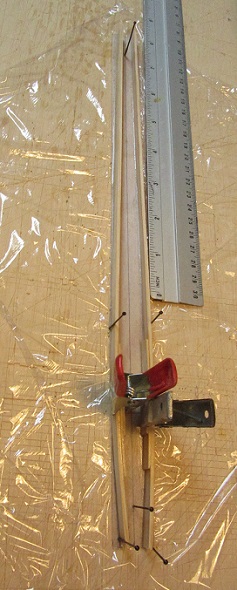
and attached it with the frame of the fuselage.
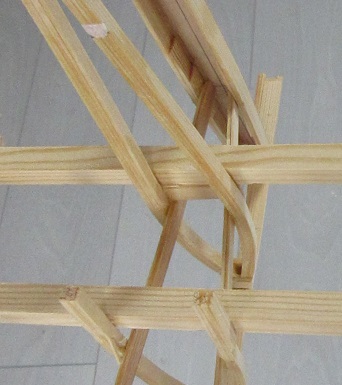
Next I glued thick balsa on the inner spruce stringer, sanded it flush on the outside.
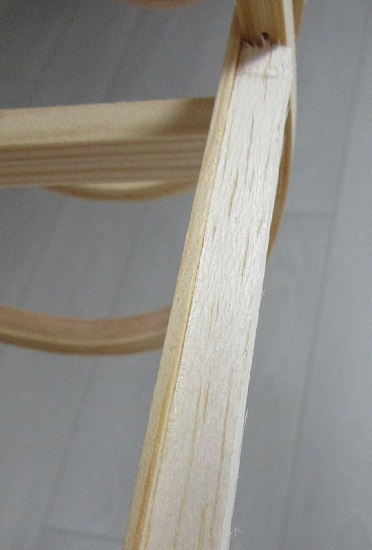
To align all the frames I had to sand them with a very long sanding block and on one frame I had to glue an additional batten.
On the outside of the balsa went a strip of 0.6mm ply, 12mm wide to stiffen the girder and later be a joiner plate for the skin.
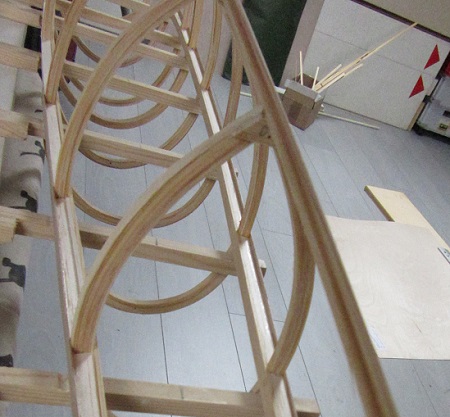
To my relief this girder appeared to be very stiff, so I thought; when I put some diagonals between the two girders it can be taken of the jig.
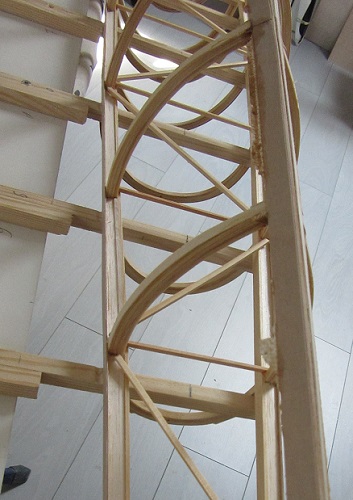
With caution I unscrewed the fuselage from the building jig and it was pretty stiff, so I could take away the temporary battens.
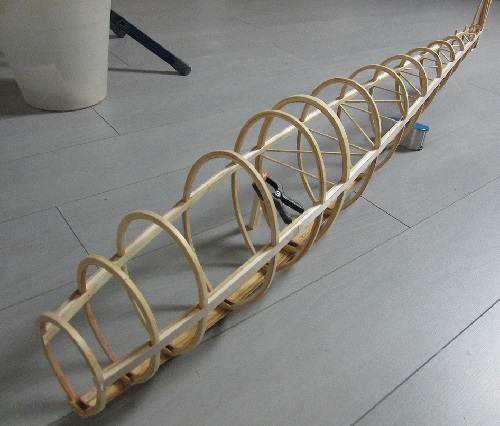
I glued a 10mm wide 0.6mm ply strip with cyano at the "keel" and reinforced this joint with a fillet from thickened epoxy.
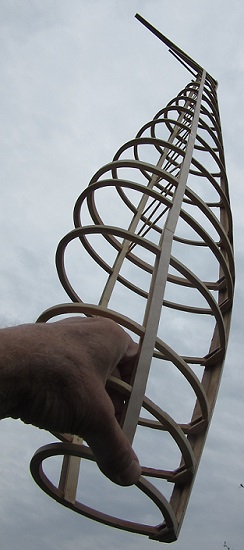
to be continued,
Vincent |
|
| Revenir en haut de page |
|
 |
Fotor
Stagiaire Posteur


Inscrit le: 26 Mar 2010

Âge: 50

|
 Posté le: 19/07/2019 20:48 Sujet du message: Posté le: 19/07/2019 20:48 Sujet du message: |
  |
|
|
Very nice Vincent, great job again.
I can't wait to tow this one into the air with the Eco Boomster. |
|
| Revenir en haut de page |
|
 |
bocorvin
Maniaco Posteur


Inscrit le: 17 Aoû 2015

Localisation: Hillegom
Âge: 79

|
 Posté le: 19/07/2019 22:42 Sujet du message: Posté le: 19/07/2019 22:42 Sujet du message: |
  |
|
|
Thanks very much for your nice comment Raymond, I am also looking forward to be towed, please have some patience 
By the way the weight of this backbone? is 330 grams.
Vincent |
|
| Revenir en haut de page |
|
 |
bocorvin
Maniaco Posteur


Inscrit le: 17 Aoû 2015

Localisation: Hillegom
Âge: 79

|
 Posté le: 04/08/2019 20:05 Sujet du message: Posté le: 04/08/2019 20:05 Sujet du message: |
  |
|
|
Hello everybody,
After all the heat I started to build was the horizontal stabilizer. I hoped to make the ribs in the conventional way, but there appeared to much taper in this packet of ribs
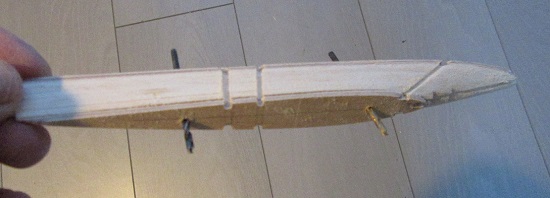
it just was not acceptable. I didn't like to ask my friend(s) to cnc the few ribs (I already asked to do the wingribs..) so I choosed a bit more basic approach. I cut a lot of 2mm balsa at the same width, pinned them down on the drawing with my ply endribs in place and sanded the tophalf in shape with a very long sanding block.
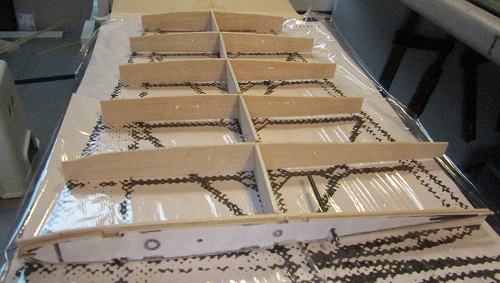
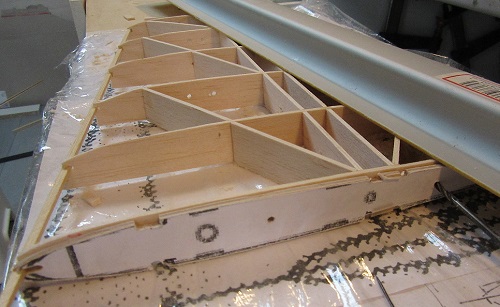
Made some sanding tools for the nodges in the ribs
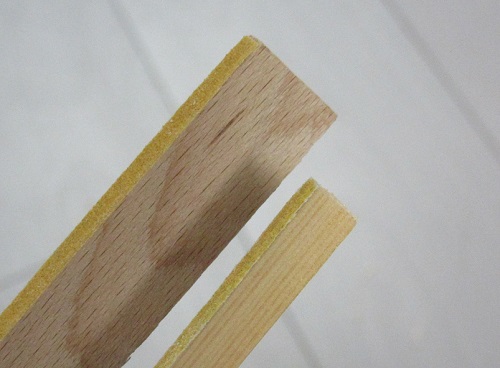
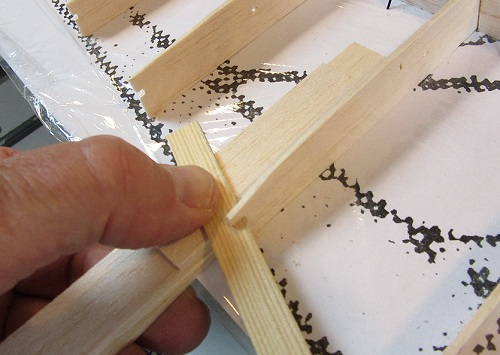
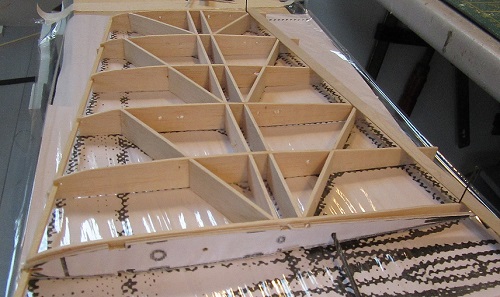
Took both halves of the building board and sanded the other side into shape. Joined both halves and made some reinforcements in the middle
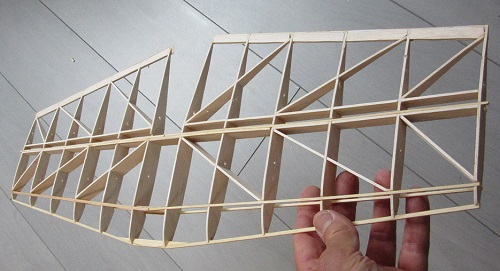
The real thing
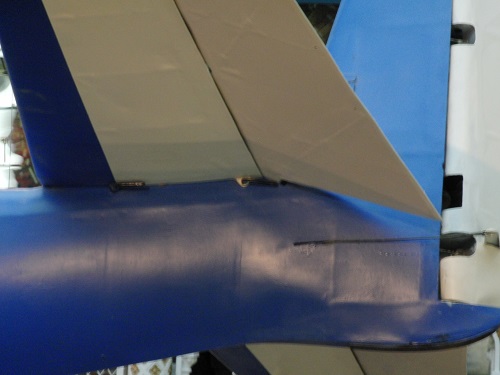
I tried to make a similar way of attaching the stabilizer to the fuselage.
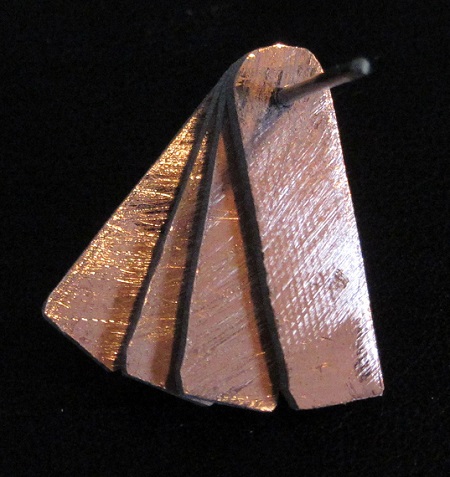
from epoxy print board and drilled 1 mm holes.
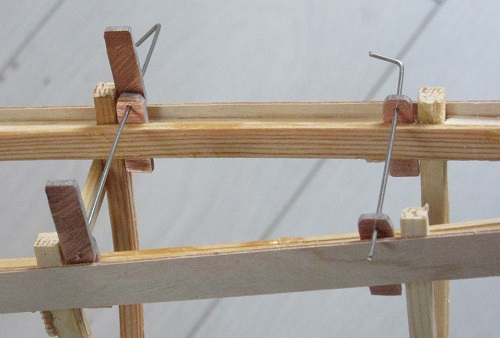
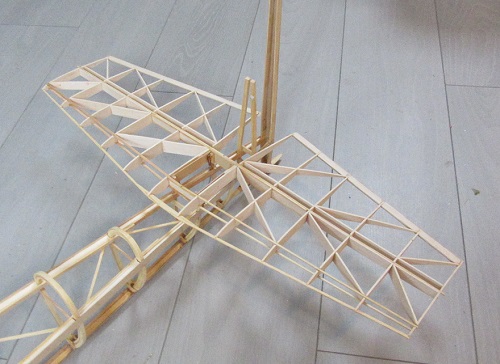
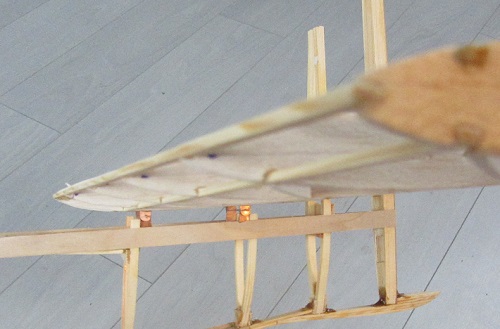
To be continued.
Vincent |
|
| Revenir en haut de page |
|
 |
bocorvin
Maniaco Posteur


Inscrit le: 17 Aoû 2015

Localisation: Hillegom
Âge: 79

|
 Posté le: 17/08/2019 16:08 Sujet du message: Posté le: 17/08/2019 16:08 Sujet du message: |
  |
|
|
Hello everybody,
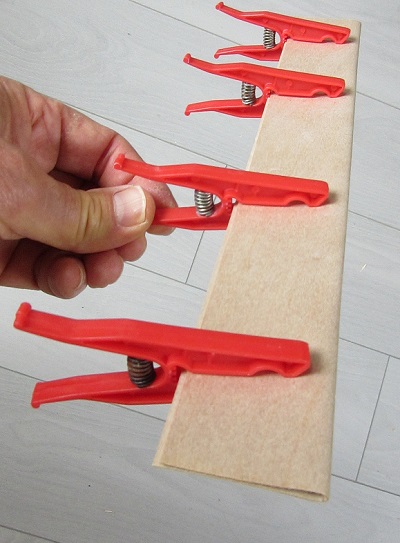
I now had the basic structure of the horizontal stabilizer. The nose had to be covered with 0.6mm ply. I thought prebending the ply; started pouring boiling water over one side of a strip of ply, wide enough for the nose
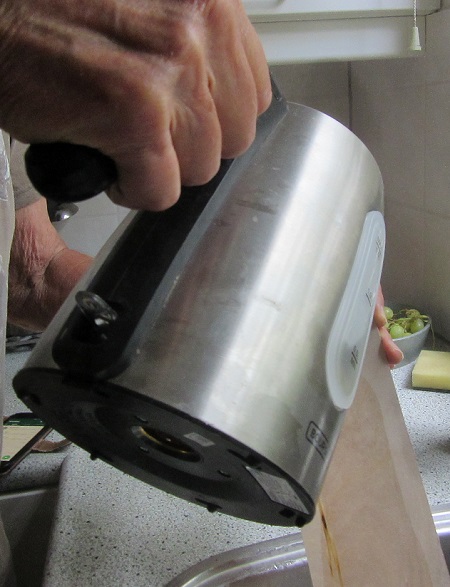
turned the strip around and folded it a "U" shape. Poured again boiling water through this "gutter"
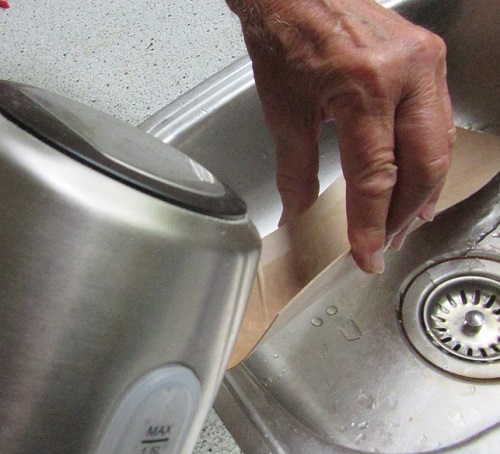
now I could easily fold it further and put some clamps on it
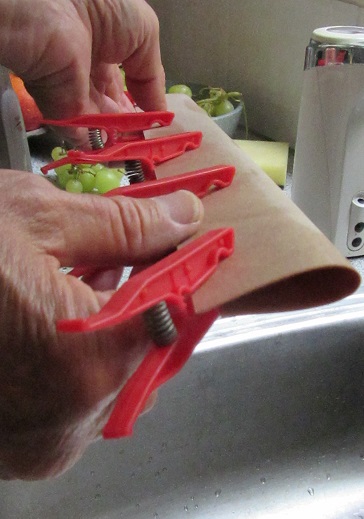
Now I poured again boiling water through this almost closed gutter
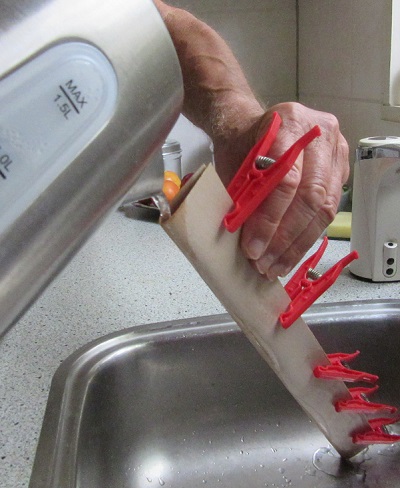
through the pressure of the clamps this gutter closes itself further
After some drying it stayes nicely in shape.
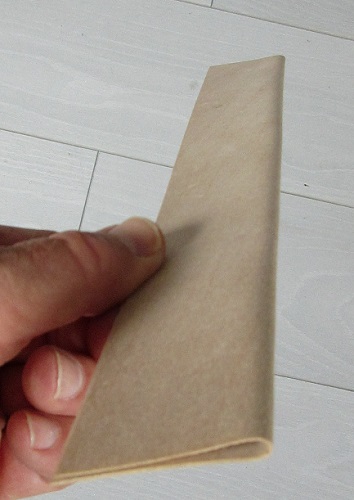
This is a sharp bend, for wider bends I fold he ply around a pipe or a wooden dowel with a suitable diameter.
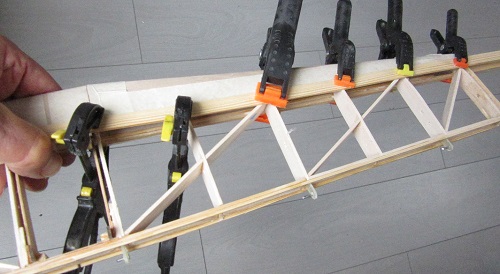
Now it was easy to glue the ply. The LE with cyano and the other parts with PVA.
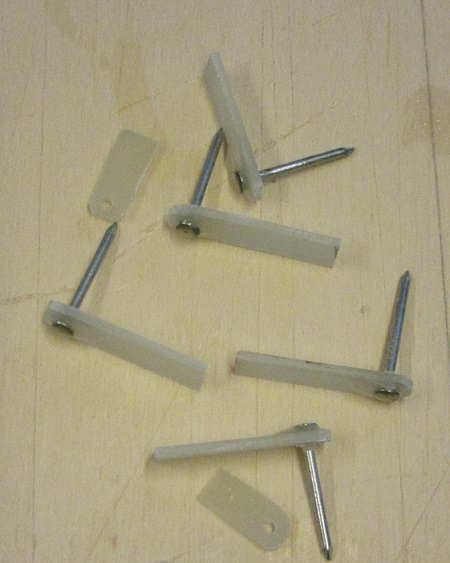
Made the hinges from epoxy sheet (like the hinges Vincent Besancon uses).
I also wanted to make the rounded front of the moving part of the elevator from ply, forming a ply tube which is very stiff in torsion.
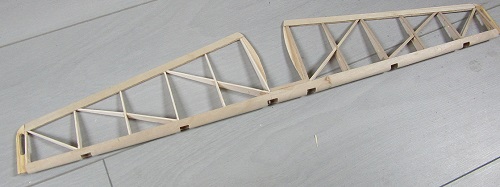
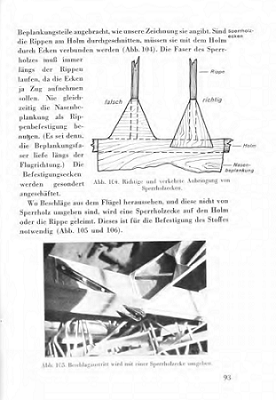
I added capstrips and gusset plates. The gusset plates are glued on top of the ply covering as Hans Jacobs put in his book
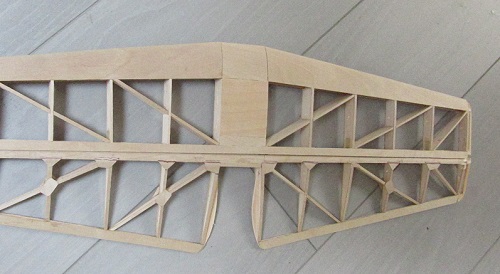
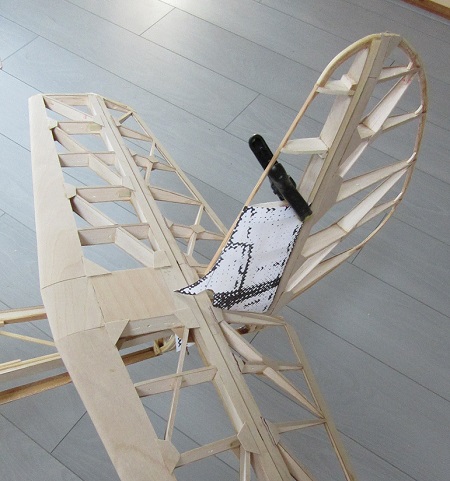
the stabilizer almost complete, it has become very rigid with the ply parts and capstrips.
Next was the rudder;
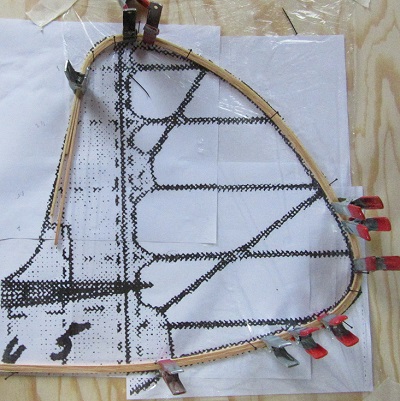
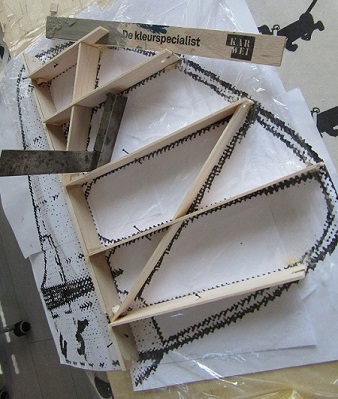
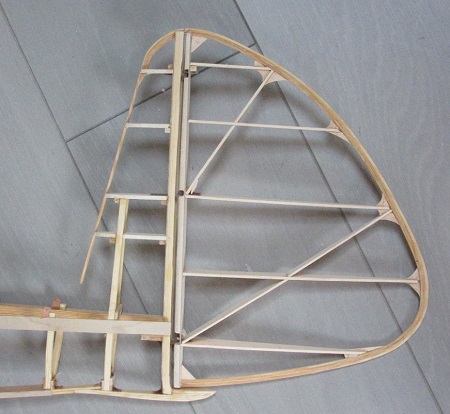
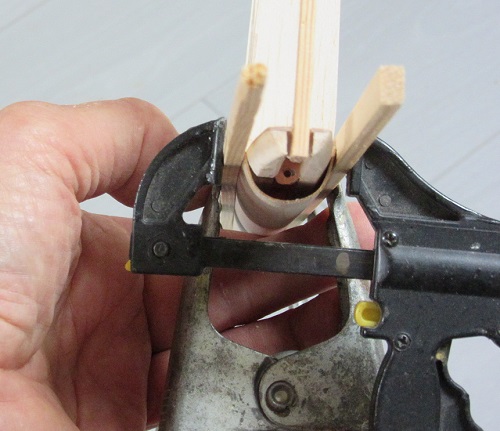
Made the rounded front of the rudder from prebent ply, using some big clamps trying to bent the ply in a nice half circle
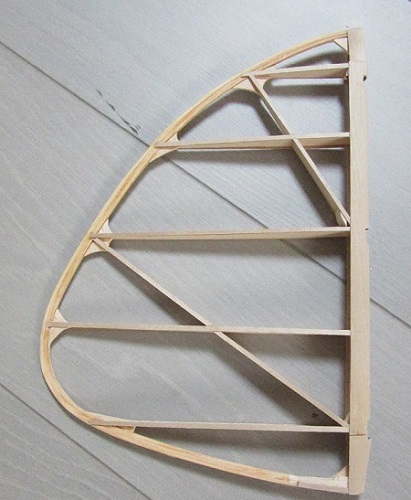
almost completed
The fixed part of the rudder
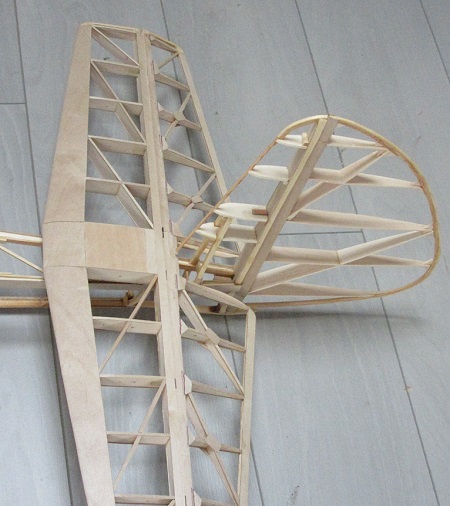
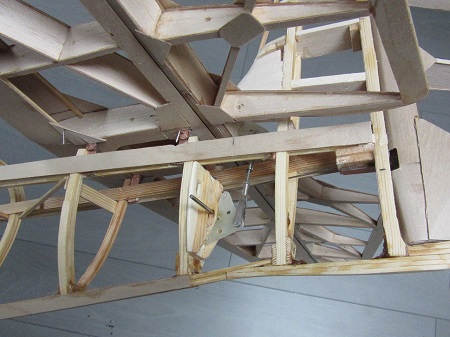
The real glider had a demountable part of the fin, I tried to make it in one piece
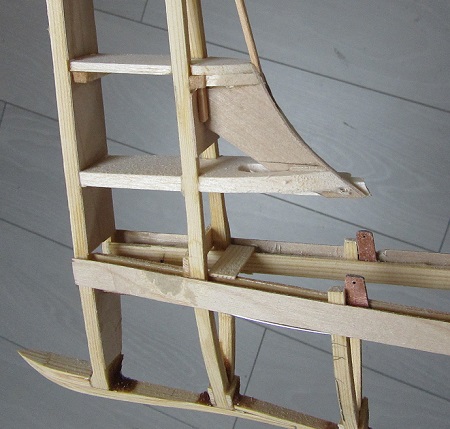
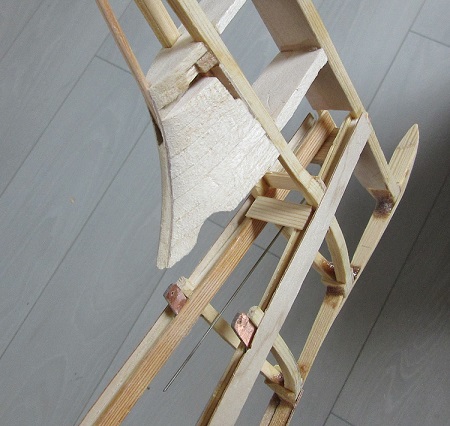
I wil cover the massive balsa piece with ply or veneer. Its a complicated spot on this glider with the actuation of the elevator, which is also demountable, I hope the pictures explain it....
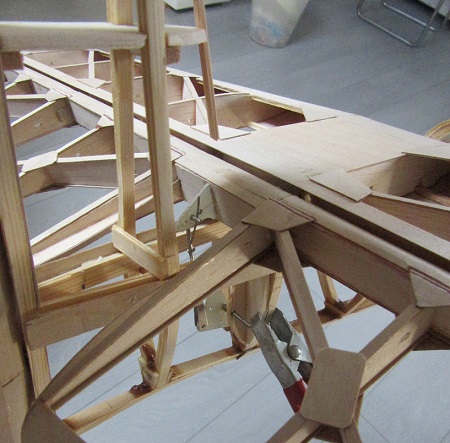
The elevator and rudder will be activated with steelcables
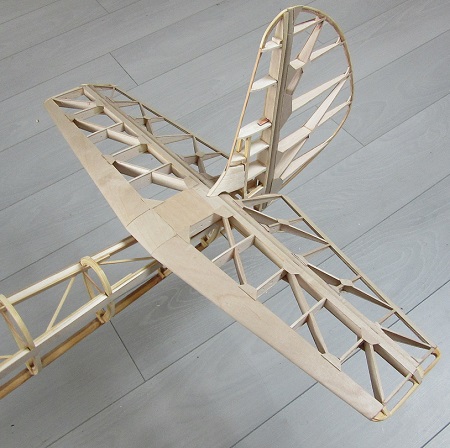
To be continued |
|
| Revenir en haut de page |
|
 |
CHAUSSEBOURG
Maniaco Posteur


Inscrit le: 22 Sep 2010

Localisation: Touraine
Âge: 87

|
 Posté le: 18/08/2019 09:43 Sujet du message: Posté le: 18/08/2019 09:43 Sujet du message: |
  |
|
|
beautiful work, congratulation!
Pierre

Lorsqu'on est toujours en l'air, c'est qu'on n'est pas encore posé.
Johannes Walkowiak
LDC |
|
| Revenir en haut de page |
|
 |
hermann
Maniaco Posteur


Inscrit le: 25 Mai 2006

Localisation: Région Parisienne
|
 Posté le: 18/08/2019 09:48 Sujet du message: Posté le: 18/08/2019 09:48 Sujet du message: |
  |
|
|
Bonjour Vincent.
Je découvre seulement maintenant ton nouveau projet 
Bravo c'est super ![[clap]](images/smiles/Clap.gif) ![[clap]](images/smiles/Clap.gif) ![[clap]](images/smiles/Clap.gif) très belle machine. très belle machine.
J'adore la réalisation du fuselage et ta technique de mise en forme des couples. ![[amen]](images/smiles/amen.gif) ![[amen]](images/smiles/amen.gif)
Ca va être un très beau modèle.
Bonne continuation
Charles |
|
| Revenir en haut de page |
|
 |
bocorvin
Maniaco Posteur


Inscrit le: 17 Aoû 2015

Localisation: Hillegom
Âge: 79

|
 Posté le: 18/08/2019 16:10 Sujet du message: Posté le: 18/08/2019 16:10 Sujet du message: |
  |
|
|
Merci Pierre et Hermann
Thanks a lot for your encouraging remarks.
I had doubts about the construction of the tailplane, but it turned out OK.
It is very, very stiff, also in torsion.
The original builders understood very well how to build with ply!
Vincent |
|
| Revenir en haut de page |
|
 |
de Schaetzen Harold
Maniaco Posteur

Inscrit le: 06 Avr 2006

Localisation: Schilde
Âge: 80

|
 Posté le: 19/08/2019 08:50 Sujet du message: Posté le: 19/08/2019 08:50 Sujet du message: |
  |
|
|
Beste Vincent,
Ik ben ook onder de indruk van jouw zeer interessante constructie.
Laminaat constructie is eigenlijk niet zo moeilijk om te gebruiken. Het vraagt een beetje geduld. Veel voorbereiding. Geeft een zeer sterkere resultaat.
Ik zie dat jij nog altijd zeer nauwkeurig en proper bouwt. Jouw beroep ben jij niet vergeten.
Mvg.
Harold |
|
| Revenir en haut de page |
|
 |
bocorvin
Maniaco Posteur


Inscrit le: 17 Aoû 2015

Localisation: Hillegom
Âge: 79

|
 Posté le: 19/08/2019 14:50 Sujet du message: Posté le: 19/08/2019 14:50 Sujet du message: |
  |
|
|
Dank je voor je vriendelijke woorden Harold!
Lamineren met (zeker met cyano) gaat erg makkelijk en snel en zoals je al zei, het is erg sterk en licht. Ik denk dat het met cyano minder sterk wordt dan met epoxy, maar het is erg makkelijk en relatief schoon. Ik heb het lamineren in de jachtbouw geleerd, vroeger gebruikten de scheepsbouwers zelfs kromme stukken boom voor de gebogen spanten, met lamineren bereik je eigenlijk hetzelfde.
Overigens staat het gemopper als dingen niet lukken niet op de foto's..... Wat je over mijn beroep opmerkte klopt wel, ik was gewend de hele dag met de hand te frezen, dat is wel aardig ingebakken.
Daarnaast ben ik er niet aan toegekomen om digitaal te tekenen en ook CNC te frezen.
Gelukkig heb ik vrienden die dat wel kunnen, zeker erg prettig bij de vleugelribben 
Mvg,
Vincent |
|
| Revenir en haut de page |
|
 |
jean-jacques stannard
Accro Posteur


Inscrit le: 21 Nov 2012

Localisation: 62 Bavincourt
Âge: 72

|
 Posté le: 19/08/2019 15:46 Sujet du message: slinsby gull Posté le: 19/08/2019 15:46 Sujet du message: slinsby gull |
  |
|
|
Hello Vincent!
I love your way of building! It will necessarily be a good sail glider    |
|
| Revenir en haut de page |
|
 |
bocorvin
Maniaco Posteur


Inscrit le: 17 Aoû 2015

Localisation: Hillegom
Âge: 79

|
 Posté le: 20/08/2019 08:39 Sujet du message: Posté le: 20/08/2019 08:39 Sujet du message: |
  |
|
|
Hi Jean-Jacques,
I can only build in this way  Hope it will fly nice. The weight of the stabilizer is now 140gr. Hope it will fly nice. The weight of the stabilizer is now 140gr.
Vincent |
|
| Revenir en haut de page |
|
 |
de Schaetzen Harold
Maniaco Posteur


Inscrit le: 06 Avr 2006

Localisation: Schilde
Âge: 80

|
 Posté le: 21/08/2019 08:18 Sujet du message: Posté le: 21/08/2019 08:18 Sujet du message: |
  |
|
|
Beste Vincent,
Ik kom even terug op jouw constructie techniek.
Ik ben verbaasd dat jij een voorkeur heb voor cyano. OK, en zeer snelle lijm, sterk, maar het moet van de 1ste keer exact staan. Geen aanpassing mogelijk. En met die verschillende "latjes naast mekaar" is dat niet eenvoudig.
Ik gebruik Pattex witte lijm, water bestendig. En dan nog veel geduld voor de droogtijd.
Mvg.
Harold |
|
| Revenir en haut de page |
|
 |
bocorvin
Maniaco Posteur


Inscrit le: 17 Aoû 2015

Localisation: Hillegom
Âge: 79

|
 Posté le: 21/08/2019 10:19 Sujet du message: Posté le: 21/08/2019 10:19 Sujet du message: |
  |
|
|
Beste Harold,
Je hebt helemaal gelijk, maar ik doe het iets anders. Uiteraard eerst folie op de tekening of ondergrond, dan buig en plaats ik alle latjes
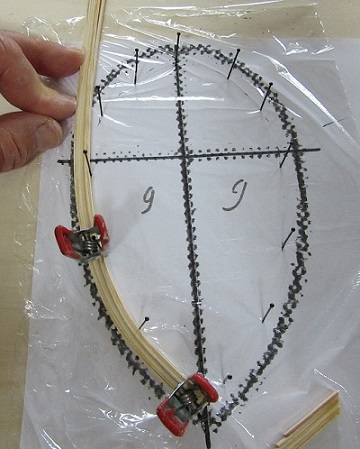
zet er klemmetjes op
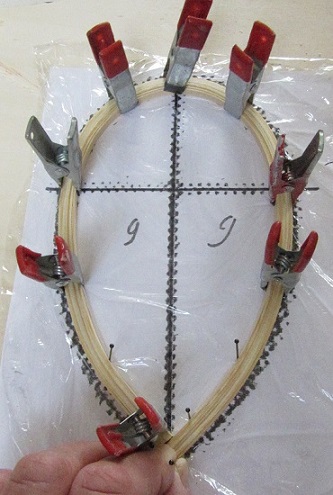
en als alles naar mijn zin is druppel ik er veel dunne cyano overheen

Als de cyano droog is, kan ik (in dit geval) het spant losmaken en eventueel wat cyano toevoegen. Ik heb dat ook met vochtige latjes gedaan. Voor spanten voldoet dit prima, gelamineerde liggers lijm ik wel met PVA of epoxy.
Vincent |
|
| Revenir en haut de page |
|
 |
hermann
Maniaco Posteur


Inscrit le: 25 Mai 2006

Localisation: Région Parisienne
|
 Posté le: 21/08/2019 10:49 Sujet du message: Posté le: 21/08/2019 10:49 Sujet du message: |
  |
|
|
Bonjour Vincent,
Super les explications ![[clap]](images/smiles/Clap.gif) ![[clap]](images/smiles/Clap.gif) , comme je le disais , j'adore cette technique particulière et qui donne d'autres perspectives de pièces à fabriquer. , comme je le disais , j'adore cette technique particulière et qui donne d'autres perspectives de pièces à fabriquer.
Seul petits soucis dans le cas du fuselage ou de pièces avec longerons est l'intégration dans la forme à obtenir ? Surement possible, mais avec quelques complications.
Pour la colle, c'est chacun son sentiment, moi j'aime bien l'époxy, mais c'est plus long et moins propre !! Je pense que la cyano a beaucoup d'avantages, on a un adepte sur Retroplane du collage cyano 
Excuse de répondre en Français mais le Néerlandais ou l'anglais ne sont pas ma tasse de thé.
Remarque : Google traduction passe très bien tous vos échanges avec Harold.
Ah ! j'oubliais : quel variété de bois utilises-tu là ?
Bonne continuation.
Charles |
|
| Revenir en haut de page |
|
 |
bocorvin
Maniaco Posteur


Inscrit le: 17 Aoû 2015

Localisation: Hillegom
Âge: 79

|
 Posté le: 21/08/2019 12:33 Sujet du message: Posté le: 21/08/2019 12:33 Sujet du message: |
  |
|
|
Bonjour Charles,
Je essaye en Francais.... merci pour votre comments!
Je pense le bois est pin. Normalement le magasin ou j'achete mon materiel a du Douglas fir.
I continue en Anglais, I use super thin cyano and because the gaps between the layers are very small, the glue is sucked in by capillary action. No hurry or stress, just put everything dry in position, add glue and almost immediately it hardens (sometimes smoking  ) )
I use this technique for fuselage frames and not so very much stressed parts. For building wing spars etc I use white glue (PVA) or epoxy with a suitable filler. (but I'cant use these above mentioned techniques)
Vincent |
|
| Revenir en haut de page |
|
 |
caralp_laurent
Psycho Posteur


Inscrit le: 30 Jan 2006

Localisation: La Houssaye en Brie 77
Âge: 53

|
 Posté le: 21/08/2019 19:04 Sujet du message: Posté le: 21/08/2019 19:04 Sujet du message: |
  |
|
|
« bocorvin » a écrit: Hi Jean-Jacques,
I can only build in this way  Hope it will fly nice. The weight of the stabilizer is now 140gr.
Vincent
Hi Vincent 
Sure it will !! And will be beautiful too 
Have a good building,
Friendly
Lolo

Lolométéo, rétro addict ;o)
"On commence à vieillir quand on remplace ses rêves par des regrets"
Sénèque |
|
| Revenir en haut de page |
|
 |
de Schaetzen Harold
Maniaco Posteur


Inscrit le: 06 Avr 2006

Localisation: Schilde
Âge: 80

|
 Posté le: 22/08/2019 09:02 Sujet du message: Posté le: 22/08/2019 09:02 Sujet du message: |
  |
|
|
Merci à Retroplane.
Merci à Vincent B.
Nous avons beaucoup de chance pour pouvoir partager nos différentes techniques de constructions.
Au delà des frontières et des différences de langues.
Et aussi grâce à Internet et le Web.
Harold
   |
|
| Revenir en haut de page |
|
 |
bocorvin
Maniaco Posteur


Inscrit le: 17 Aoû 2015

Localisation: Hillegom
Âge: 79

|
 Posté le: 22/08/2019 16:17 Sujet du message: Posté le: 22/08/2019 16:17 Sujet du message: |
  |
|
|
Completely right!   
Vincent |
|
| Revenir en haut de page |
|
 |
bocorvin
Maniaco Posteur


Inscrit le: 17 Aoû 2015

Localisation: Hillegom
Âge: 79

|
 Posté le: 11/09/2019 11:37 Sujet du message: Posté le: 11/09/2019 11:37 Sujet du message: |
  |
|
|
Bonjour a tous,
I made a start with the wing. Because it has the form of a gull, the building board couldn't be flat. Also the "fold" isn't sharp, but its curved. This is my solution

I also made a very basic drawing of the wing, which is lying on this building board. In the meantime Rob draw the ribs, using the original profile, NACA 4416 (like the real glider). To optimize the gliding the profile gets thinner (12%) towards the nod. Adri CNC'd them from poplar ply, only the ribs at the root from birch ply. Thanks very much Adri and Rob ![[clap]](images/smiles/Clap.gif) ![[clap]](images/smiles/Clap.gif) ![[clap]](images/smiles/Clap.gif) , the milling makes building much nicer! We had some discussion about ribs built up from battens or just ply. Adri came up with a good alternative, he milled quite big apertures in the ribs, on which I could glue slats. Now there was some luck, the ribs of the original Petrel (a glider from the same builder as the Gull) were constructed in a similar way. , the milling makes building much nicer! We had some discussion about ribs built up from battens or just ply. Adri came up with a good alternative, he milled quite big apertures in the ribs, on which I could glue slats. Now there was some luck, the ribs of the original Petrel (a glider from the same builder as the Gull) were constructed in a similar way.
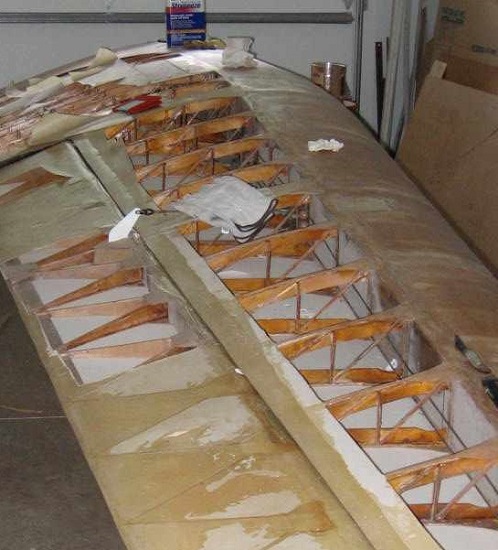
Most of the milled ribs

A tryout with slats of 2X2 mm, the 1X1mm are on backorder  coming soon I hope. coming soon I hope.
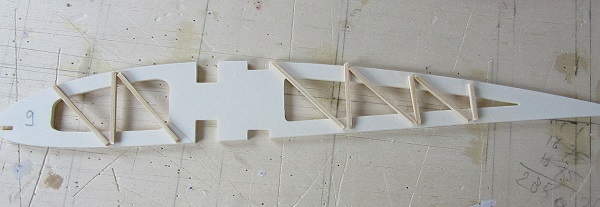
I went on with the mainspar, first the scarf joints
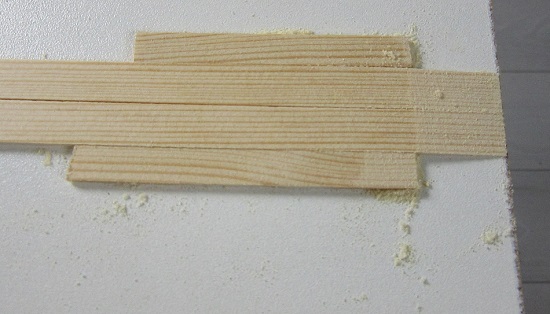
I learnt to make them in pairs, fits always! (The two short slats are glued to the worksurface, so its easier sanding)
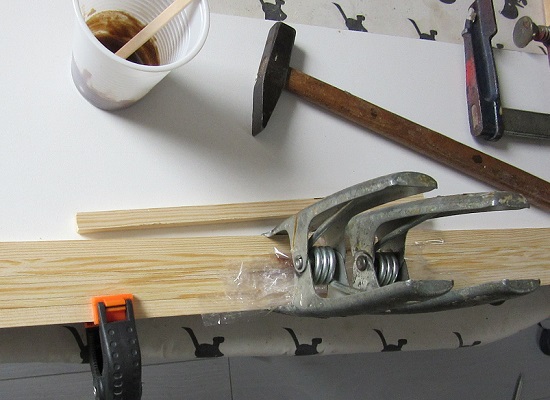
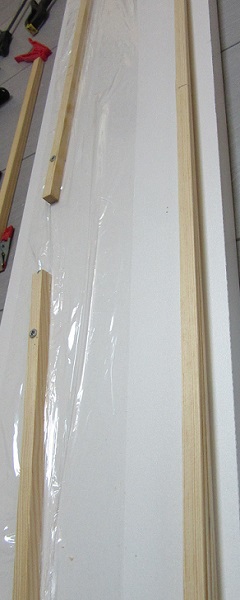
Glued with slow curing epoxy and wooddust as filler
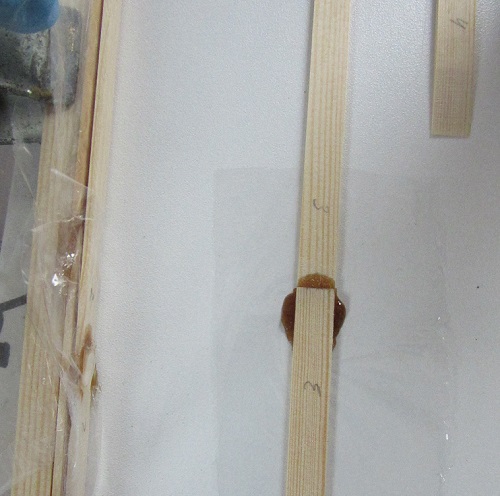
wrapped in thin foil
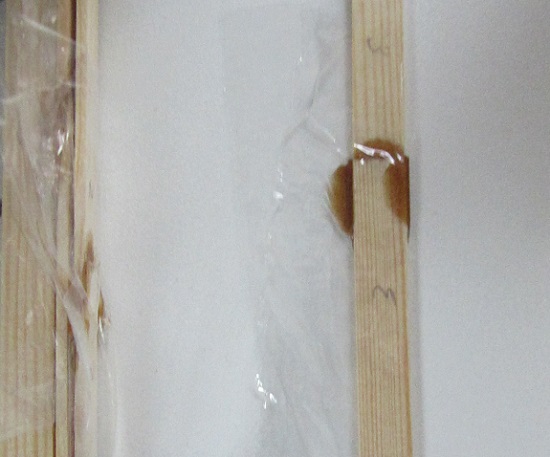
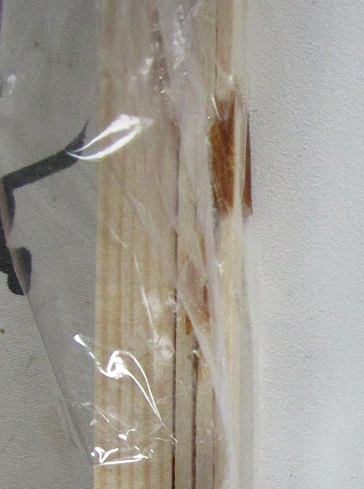
clamped together
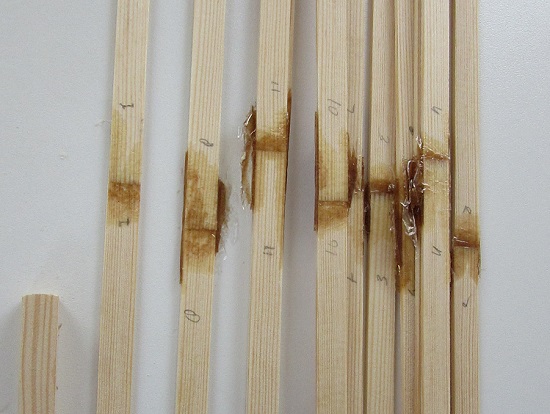
and finished
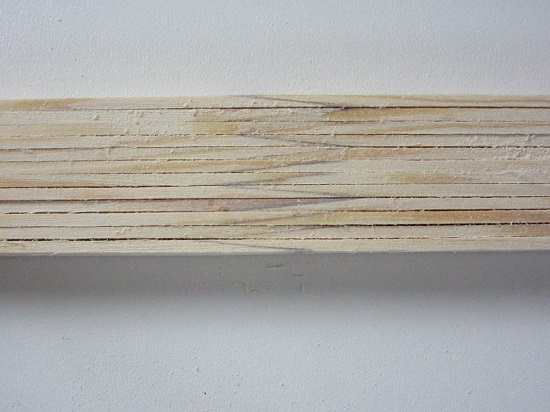
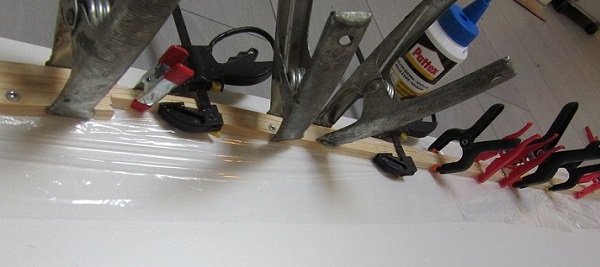
Laminated into upper and lower spar. From 5 layers to 1 layer, glued with PVA. glue on the layers
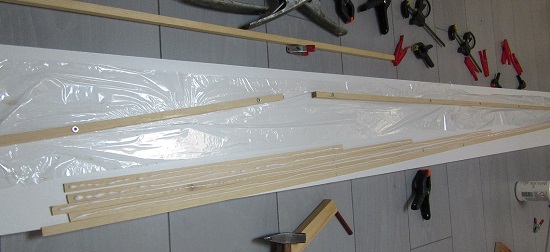
the layers layed on top of each other
and clamped in shape
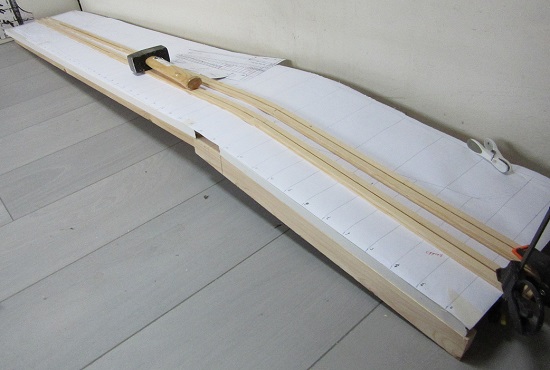
the finished spars, lying on the building board
Because I was waiting for the slats for the ribs, I started with the servo tray for the ailerons. The actuation will be with pull-pull wires, so I thought to place the servo in the root rib, so I could slide it out to adjust the wires
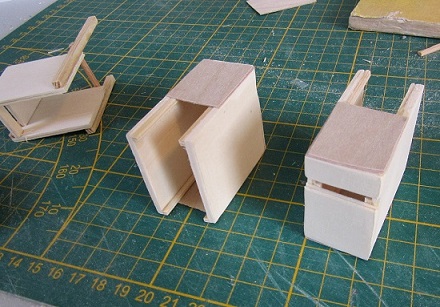
to the left, my first tryout...
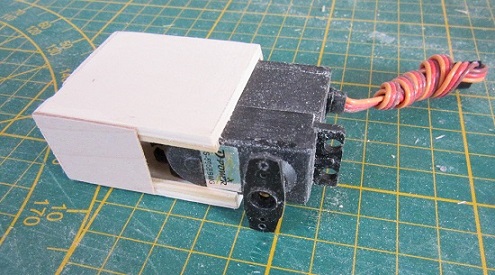
Next thing thing were the airbrakes. The hinges of the original where a kind of piano hinges, so I tried to make something similar
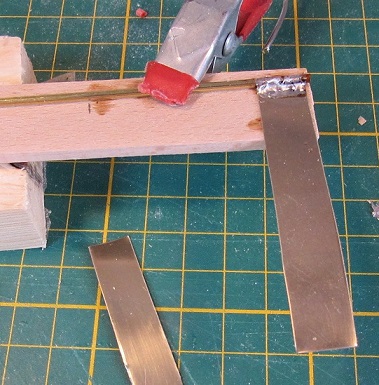
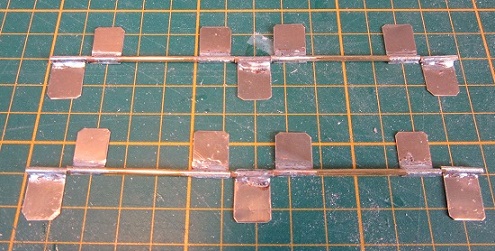
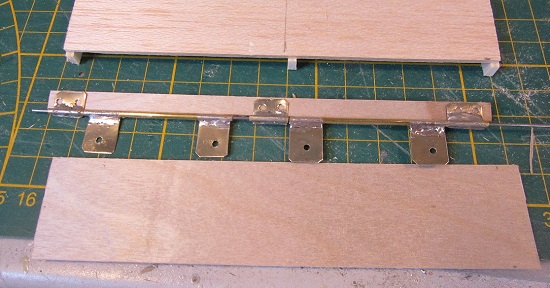
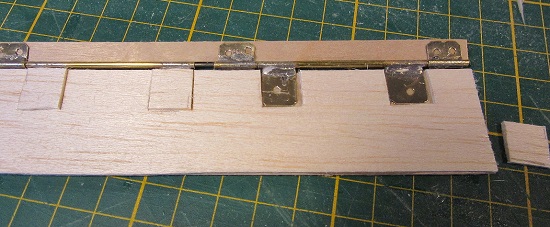
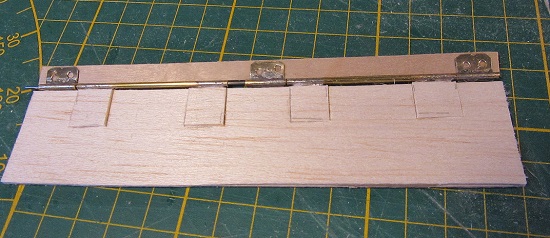
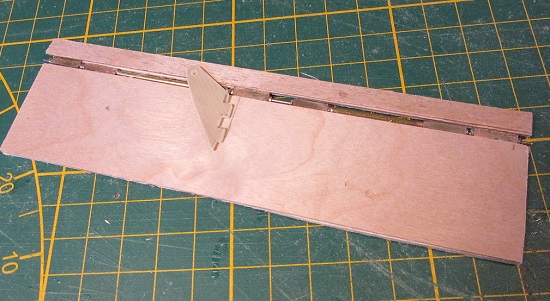
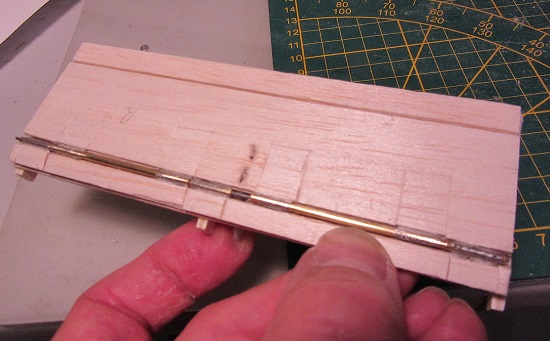
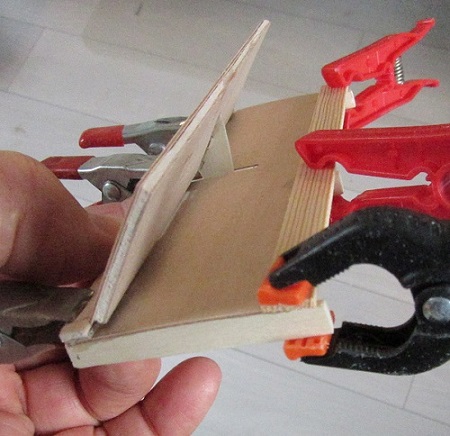
To be continued,
Vincent |
|
| Revenir en haut de page |
|
 |
bocorvin
Maniaco Posteur


Inscrit le: 17 Aoû 2015

Localisation: Hillegom
Âge: 79

|
 Posté le: 18/09/2019 19:41 Sujet du message: Posté le: 18/09/2019 19:41 Sujet du message: |
  |
|
|
Hello everyone,
I went on with the fuselage. The intention was to make a load bearing skin, this gave some difficulties at the wing- fuselage connection. I also doubted about the carbon wingjoiner(s). I made a center section
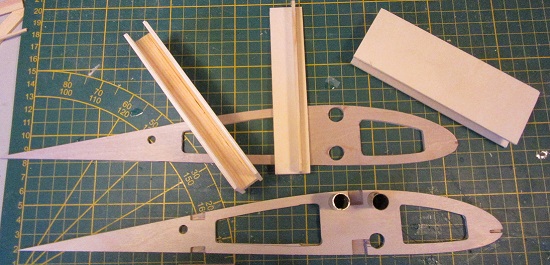
which will be incorporated in the fuselage later
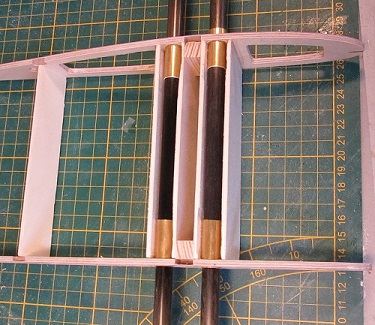
I also changed the short sections of the brass tube for full lengths pieces.
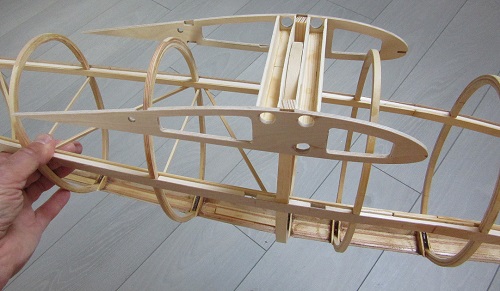
To get a better load distribution I laminated some partial bulkheads.
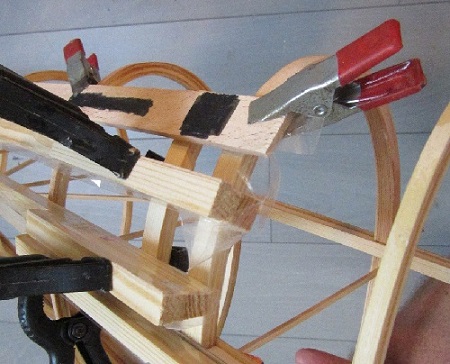
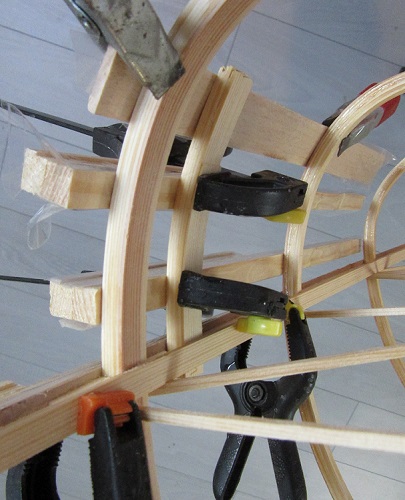
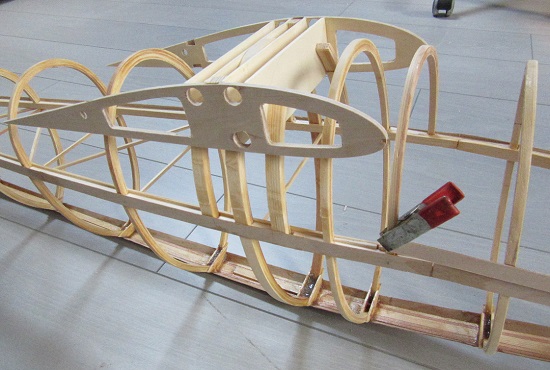
some internal reinforcements which I plan to use after the applying of the plywood skin, wait and see....
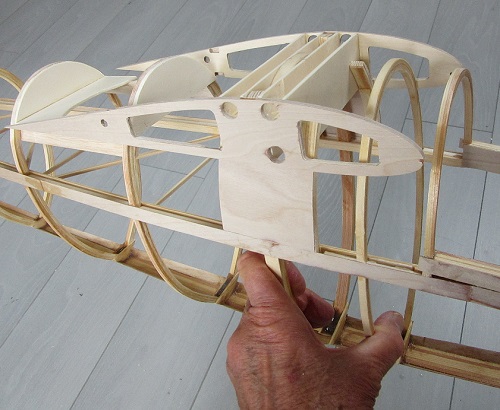
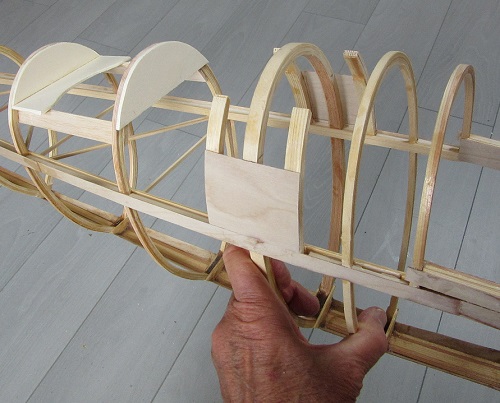
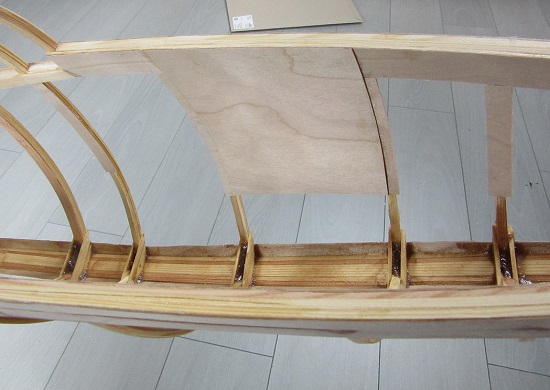
The cockpit was the next item
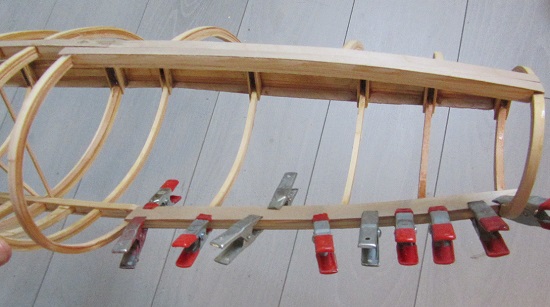
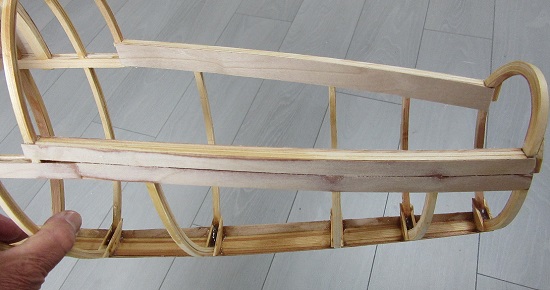
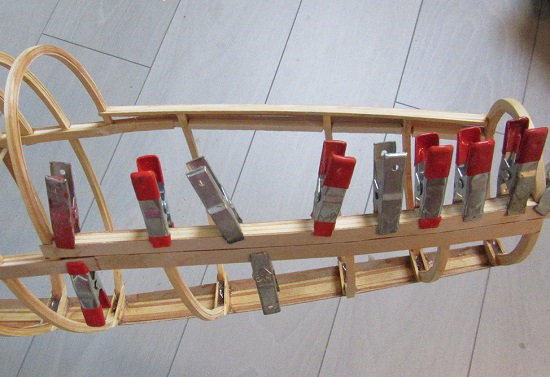
internal ply sheeting
the nose cone build up of 10mm balsa. It will be used as a core for the ply sheeting
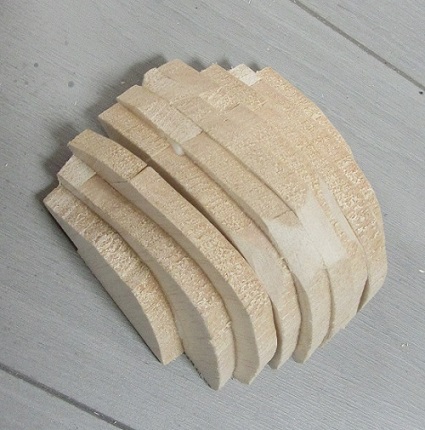
looks not very well
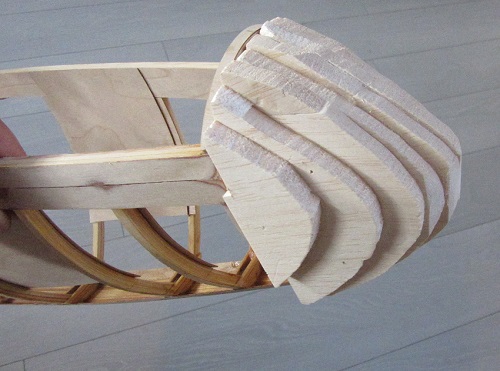
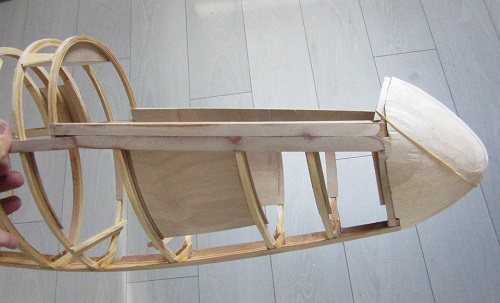
the nose cone, with plenty of space for ballast
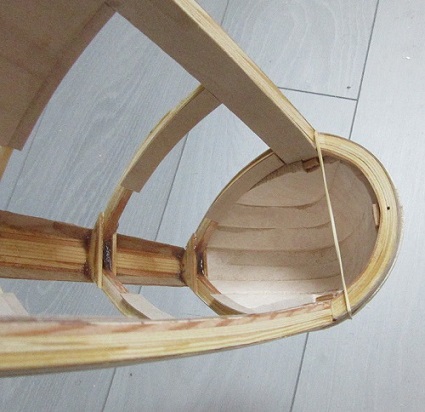
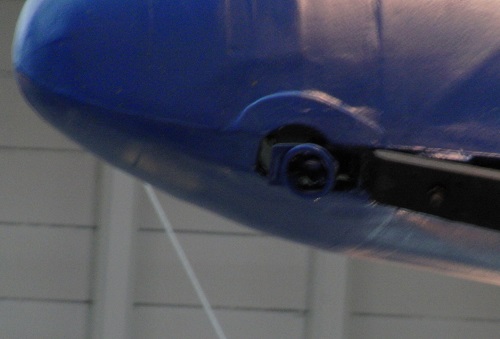
In the meantime I thought about the placing of the servo's and the towhook (for aerotow)The real one had the ring of the coupling at the first bulkhead and I decided it was better to make the coupling myself to create enough space for the feet of the pilot
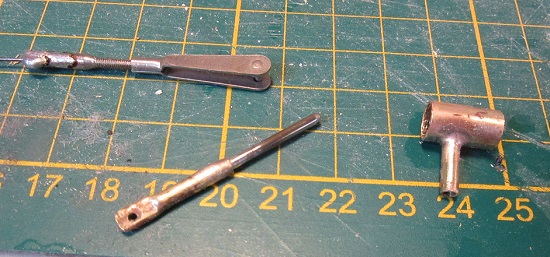
all soldered with silver
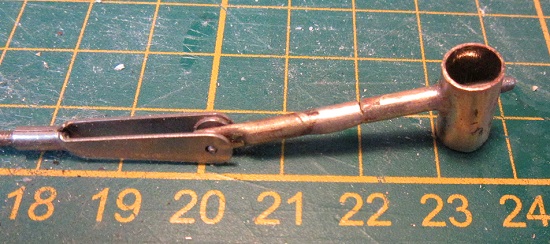
its a 2mm steel pin sliding in brass
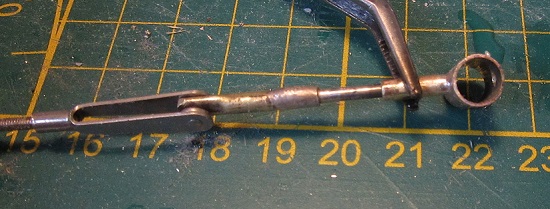
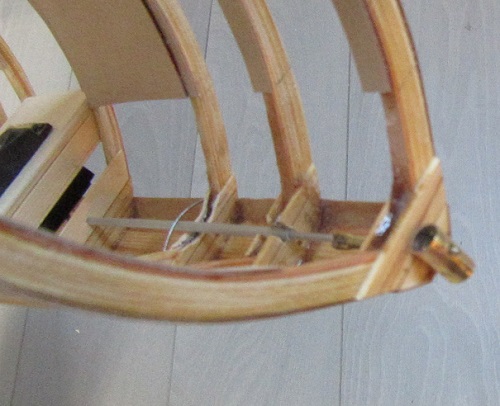
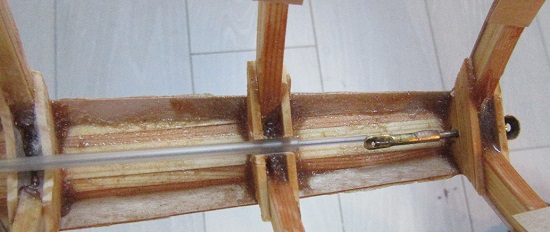
The only option to place the servo's was just behind the pilots seat
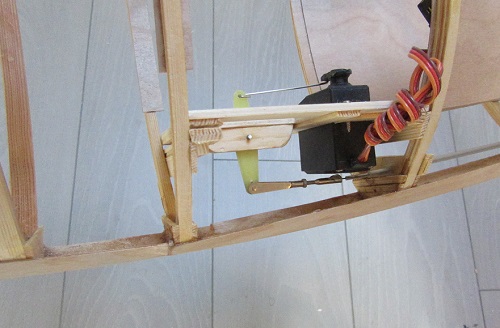
The elevator and rudder will be actuated with pull-pull wires
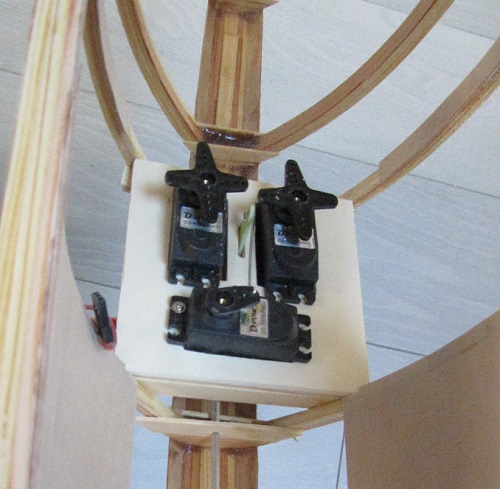
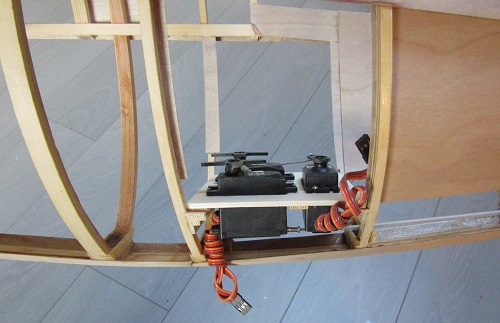
Most parts in a try-out . The brass tubes for the wingjoiners are already epoxied in place.
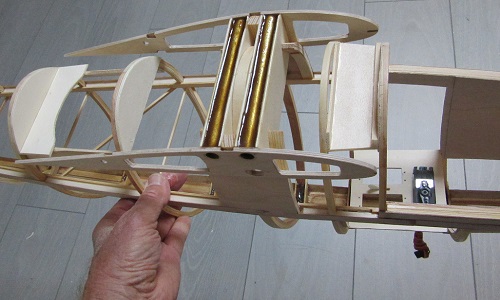
to be continued.
Vincent
|
|
| Revenir en haut de page |
|
 |
|

