| Voir le sujet précédent :: Voir le sujet suivant |
| Auteur |
Message |
bocorvin
Maniaco Posteur


Inscrit le: 17 Aoû 2015

Localisation: Hillegom
Âge: 79

|
 Posté le: 16/05/2021 19:35 Sujet du message: Posté le: 16/05/2021 19:35 Sujet du message: |
  |
|
|
Merci beaucoup Lolo  , in the meantime I went on, , in the meantime I went on,
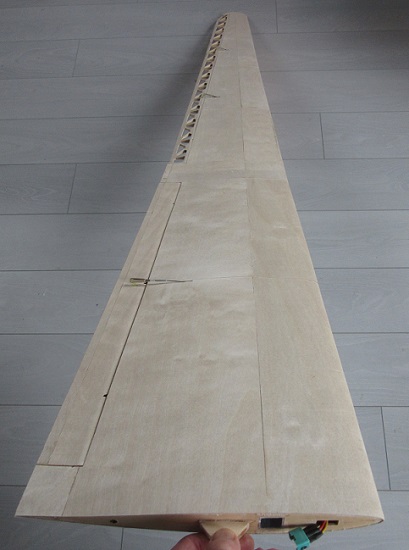
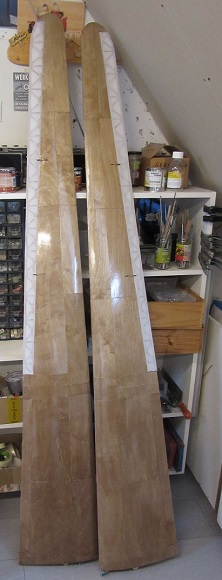
The wings are completely sheeted. Again a lot of panels, glued with the same technique, dried PVA and fixed with a foil iron
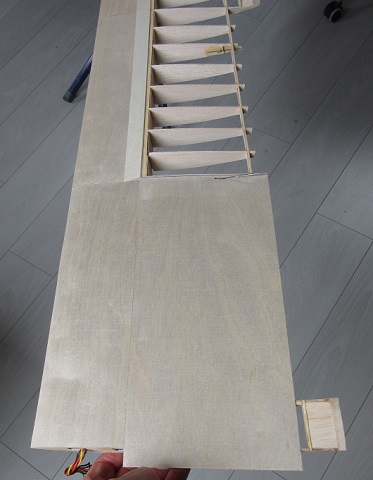
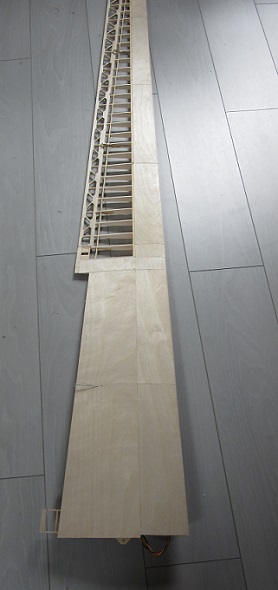
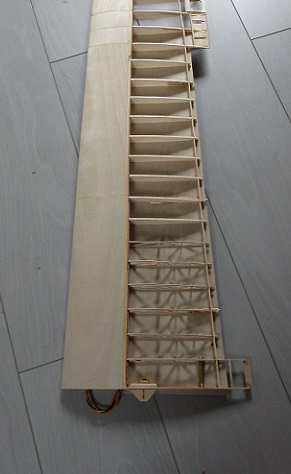
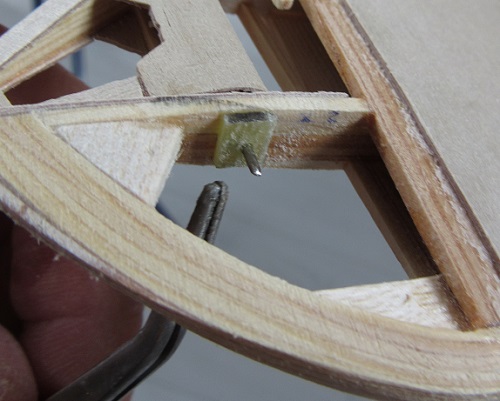
I have some doubts how that sticks to the balsa ribs, I think I should apply 2X PVA on them, now that the wing is still “open ”, I can apply some extra glue, but when the top goes on, that will no longer be possible. As I got closer to the wingtip, I found that an extra pivot point for the aileron was needed. First drilled an oversized hole and then glued an epoxy bearing plate to the rib
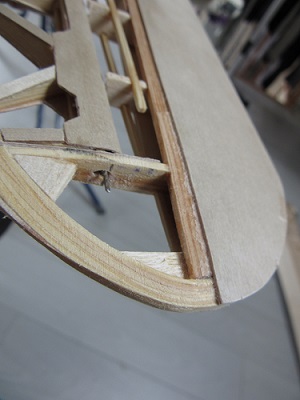
With a long batten with sanding paper I sanded the edge of the sheeting straight
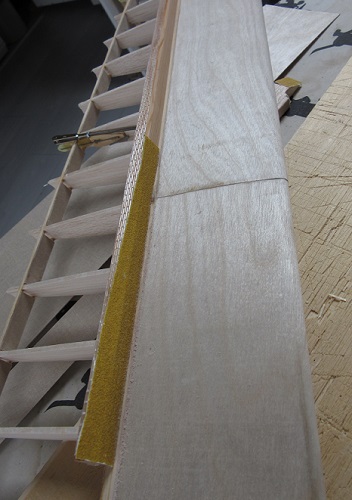
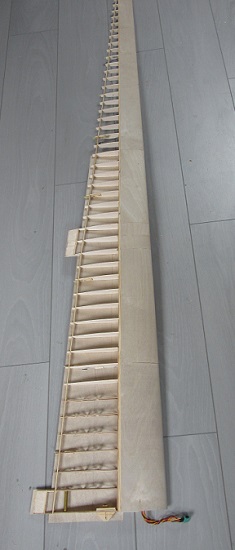
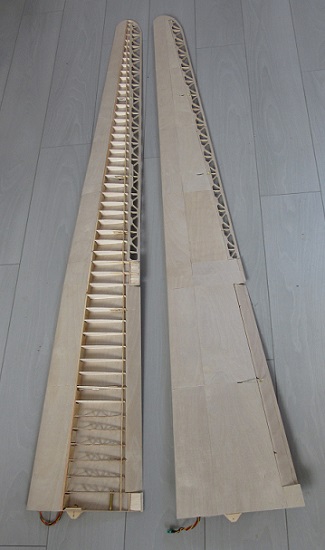
The sheeted wings look very strong
Vincent (DB) |
|
| Revenir en haut de page |
|
 |
Sed
Maniaco Posteur


Inscrit le: 13 Mai 2015

Localisation: Villeurbanne
Âge: 59

|
 Posté le: 16/05/2021 20:50 Sujet du message: Posté le: 16/05/2021 20:50 Sujet du message: |
  |
|
|
Hi Vincent,
Very nice job ![[clap]](images/smiles/Clap.gif) ![[clap]](images/smiles/Clap.gif) . I hadn't seen in the photos that the wing was completely sheeted. It will be very solid . I hadn't seen in the photos that the wing was completely sheeted. It will be very solid ![[grrr]](images/smiles/grrr.gif) ! !
Good continuation.

Serge |
|
| Revenir en haut de page |
|
 |
bocorvin
Maniaco Posteur


Inscrit le: 17 Aoû 2015

Localisation: Hillegom
Âge: 79

|
 Posté le: 16/05/2021 21:52 Sujet du message: Posté le: 16/05/2021 21:52 Sujet du message: |
  |
|
|
Hi Serge,
Yes, they were completely (except the ailerons) sheeted. It was a very modern glider for its time.
Through a mistake in the building jig (the real one  ) they built 3! prototypes with wrong washout at the tips. These gliders where extremly difficult to get out of a spin and that was solved by a very large rudder. (not on my model) ) they built 3! prototypes with wrong washout at the tips. These gliders where extremly difficult to get out of a spin and that was solved by a very large rudder. (not on my model)
Vincent (DB) |
|
| Revenir en haut de page |
|
 |
Sed
Maniaco Posteur


Inscrit le: 13 Mai 2015

Localisation: Villeurbanne
Âge: 59

|
 Posté le: 16/05/2021 22:16 Sujet du message: Posté le: 16/05/2021 22:16 Sujet du message: |
  |
|
|
Thank you Vincent for these detailed explanations ![[good]](images/smiles/good.gif) ! !

Serge |
|
| Revenir en haut de page |
|
 |
bocorvin
Maniaco Posteur


Inscrit le: 17 Aoû 2015

Localisation: Hillegom
Âge: 79

|
 Posté le: 22/05/2021 10:52 Sujet du message: Posté le: 22/05/2021 10:52 Sujet du message: |
  |
|
|
Hello everyone,
I now sheeted the topside of the wing, pre-priming the balsa ribs with PVA, that seems to work better.
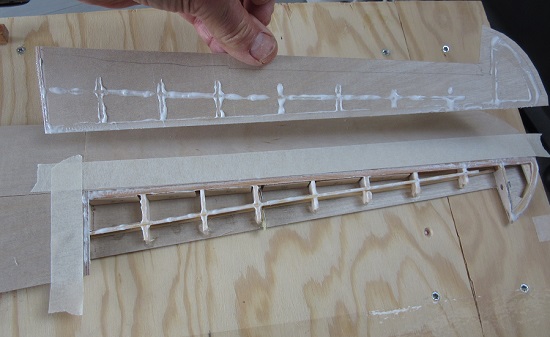
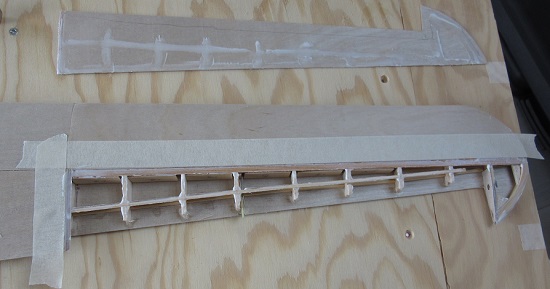
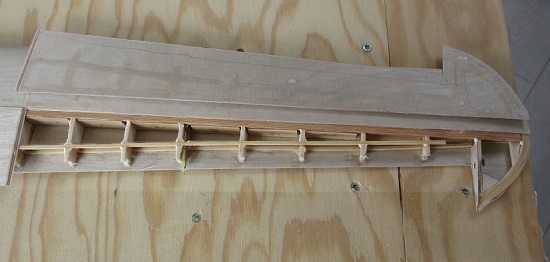
Next I had to trim the back of the sheeting for the ailerons and flaps. By the way, I had already done that with the bottom sheeting before applying the top sheeting. I did this by drilling a few 1mm pilot holes with the hinge pins as guidance and cutting the plywood along these holes. Of course there was still a lot of sanding. When the top of the wings were sheeted, I just repeated the process.
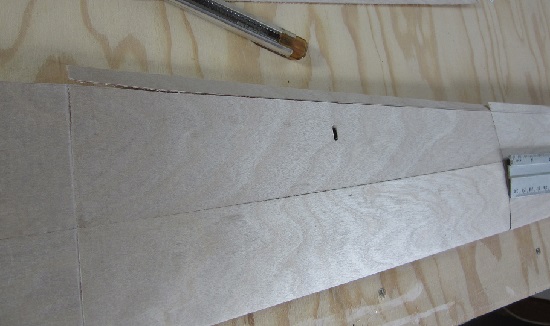
The ailerons and flaps remain demountable, just like that of the horizontal stabilizer
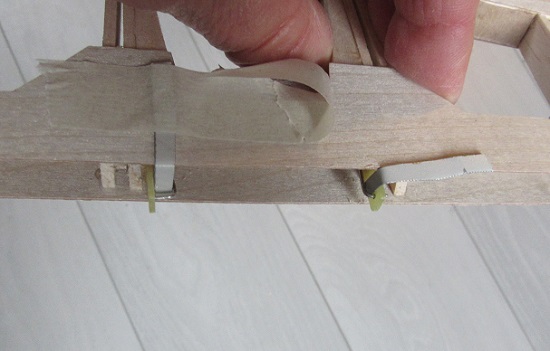
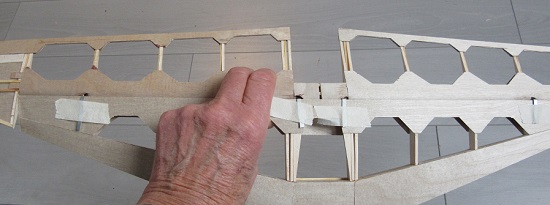
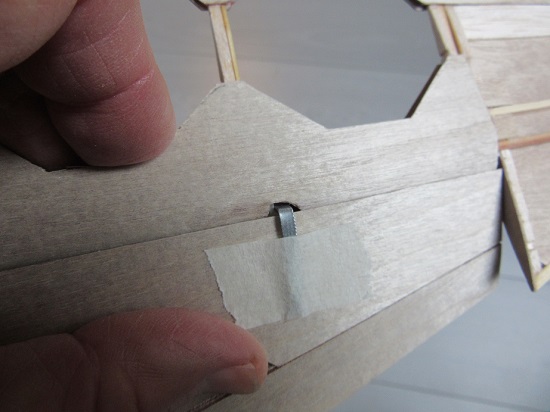
I plugged in the leads and to my relief it all worked.
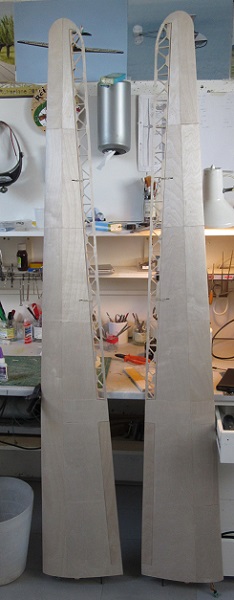
The wings are now roughly finished weigh 936 and 942 grams.
Vincent (DB) |
|
| Revenir en haut de page |
|
 |
Olli
Incurable Posteur


Inscrit le: 22 Juil 2006

Localisation: Germany
Âge: 58

|
|
| Revenir en haut de page |
|
 |
bocorvin
Maniaco Posteur


Inscrit le: 17 Aoû 2015

Localisation: Hillegom
Âge: 79

|
 Posté le: 23/05/2021 17:11 Sujet du message: Posté le: 23/05/2021 17:11 Sujet du message: |
  |
|
|
Hi Olli,
Danke  , jetzt muss Ich die Pilotenpuppe machen, dann kann mein Schwester hoffentlich die Kleider machen. , jetzt muss Ich die Pilotenpuppe machen, dann kann mein Schwester hoffentlich die Kleider machen.
LG,
Vincent(DB) |
|
| Revenir en haut de page |
|
 |
Johannes
Serial Posteur


Inscrit le: 23 Juil 2007

Localisation: Leichlingen
Âge: 66

|
 Posté le: 23/05/2021 19:44 Sujet du message: Posté le: 23/05/2021 19:44 Sujet du message: |
  |
|
|
Super Idee, Vincent ![[good]](images/smiles/good.gif)
Ich werden auch mal meine Schwester fragen für die
Pilotenpuppe meines nächsten Modells die Garderobe zu schneidern.
Sie ist wohl auch nicht mehr taufrisch aber kann
ja mal was für ihren Burder machen  
LGJ


|
|
| Revenir en haut de page |
|
 |
caralp_laurent
Psycho Posteur


Inscrit le: 30 Jan 2006

Localisation: La Houssaye en Brie 77
Âge: 53

|
 Posté le: 25/05/2021 20:26 Sujet du message: Posté le: 25/05/2021 20:26 Sujet du message: |
  |
|
|
![[clap]](images/smiles/Clap.gif) ![[amen]](images/smiles/amen.gif) ![[amen]](images/smiles/amen.gif) ![[amen]](images/smiles/amen.gif) ![[good]](images/smiles/good.gif)
Friendly,
Lolo

Lolométéo, rétro addict ;o)
"On commence à vieillir quand on remplace ses rêves par des regrets"
Sénèque |
|
| Revenir en haut de page |
|
 |
bocorvin
Maniaco Posteur


Inscrit le: 17 Aoû 2015

Localisation: Hillegom
Âge: 79

|
 Posté le: 24/06/2021 13:36 Sujet du message: Posté le: 24/06/2021 13:36 Sujet du message: |
  |
|
|
Bonjour a tous,
Danke Johannes et merci Lolo for your comments, I go on.
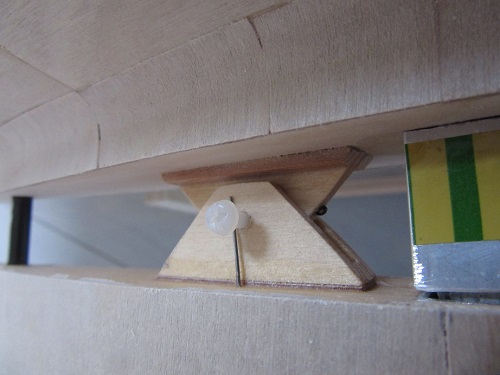
The connection of the wing to the fuselage is a bit different than I am used to. In the real glider there is a gap between fuselage and wing to get to the connecting gear.
This gap is covered with a curved strip of plywood
I tried to replicate this. The wing of my model slides over the square glass epoxy wing connector and is secured with a nylon M3 bolt in plywood lips on the fuselage and wing.
.. I made a constructing aid consisting of 2 ribs (equivalent to the root rib). On this I clamped plywood with two rows of 3mm holes. On the inside I put first 2mm balsa and another strip of plywood
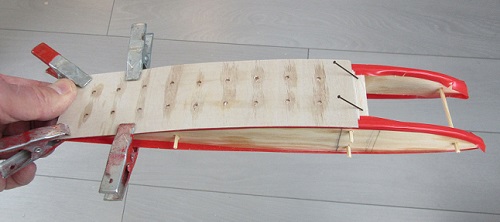
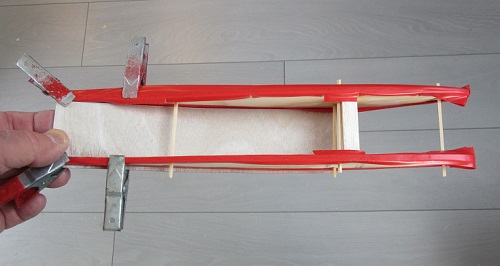
Holding the inner plywood in place with my fingers, I ran thin cyano through the holes on the balsa. I made a nose piece and also an upper and lower piece, up to the TE
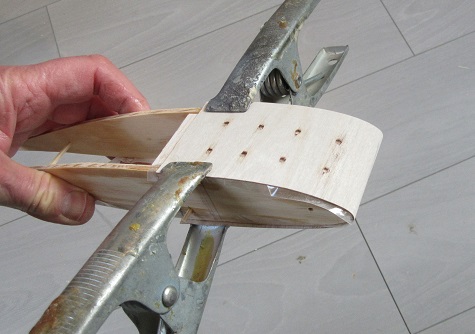
Then I glued the three pieces together, and cut it lengthwise forming the two filler pieces. I glued magnets to the rear to secure it
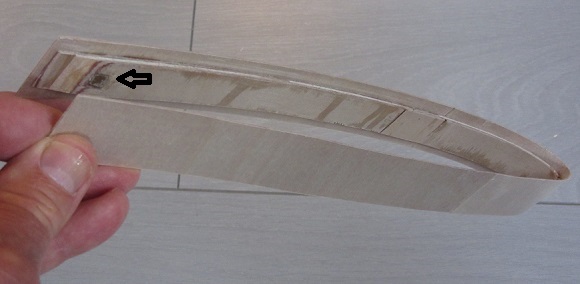
This piece now fits exactly in the gap and I glued 5mm wider strips on top, that fit just over the wing and fairing on the fuselage. You slide it over the wing
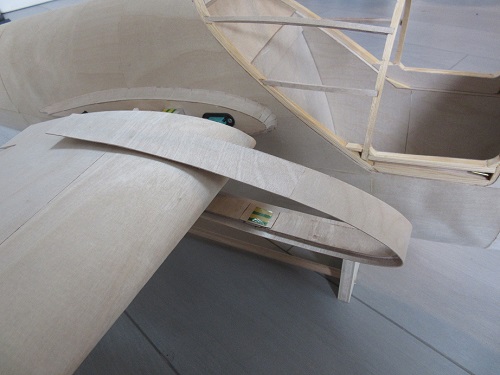
and click the magnets
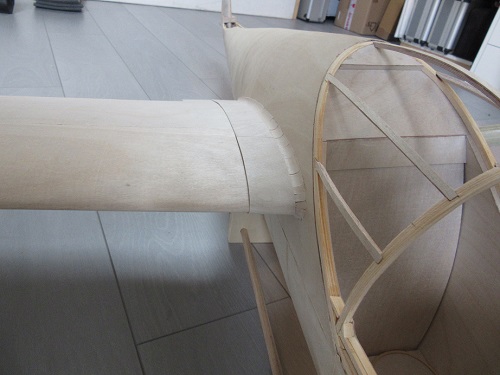
to my relief It suddenly formed a visual unit with the fuselage.
It was time for the interior, first the pilot.
The pilot is very visible, nice to make proper job of it. My sister wanted to make the clothes, but then I must have a figure first. I used my own measurements (a bit photoshopped....) and made the parts from 10mm balsa
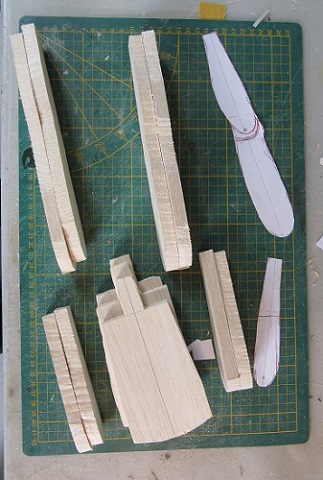
. In the elbows and knees I fitted Hobart hinges,
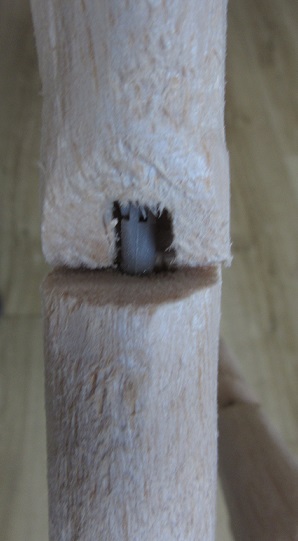
the hips and shoulders I fixed with shockcord
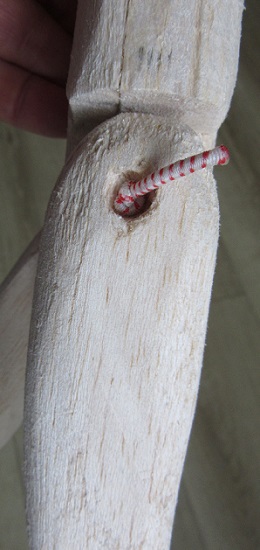
In this way you get a figure that can be positioned naturally.
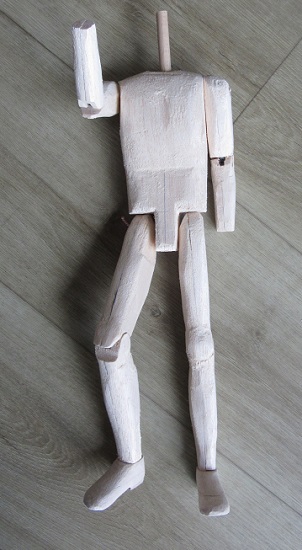
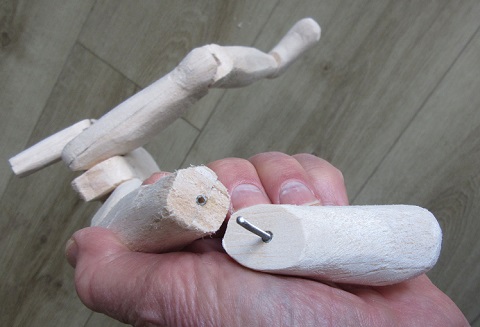
To attach the balsa boots I have glued a piece of M2 threaded rod in, which fits into a plastic tube (control tube stuff) in the lower leg. A small bend in the M2 wire provides some friction, just bend it carefully a little. The hands come with 1mm copper wire in the arms and the head with 10mm beech dowel in the chest. Hands, feet and head remain removable, much easier to get him into his clothes.
In the meantime I started with the head, made of sculpey. I learned a lot from next tutorial, it gives a wonderful explanation, but it is a time consuming job
https://www.youtube.com/watch?v=WlPYWe2bGUo
I start with beech dowel of 10mm, wrap aluminium foil around it (the head may not be solid, it might crack when baking) and then I build the head from layers sculpey
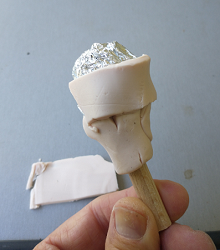
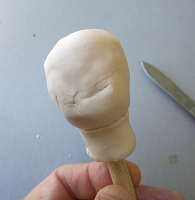
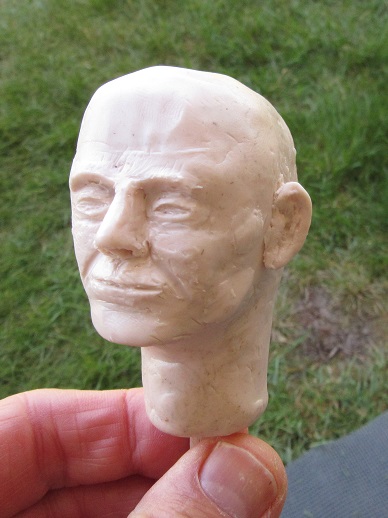
takes me a while, but it's nice work and it starts to look like something
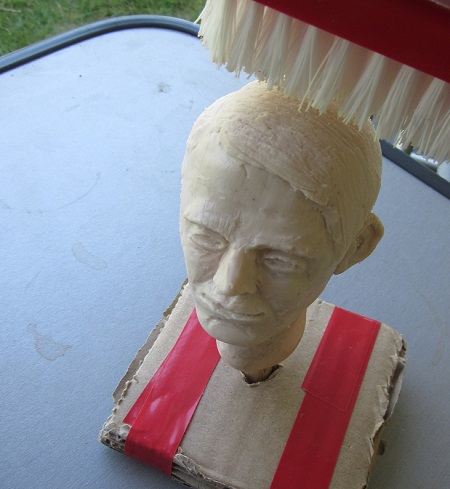
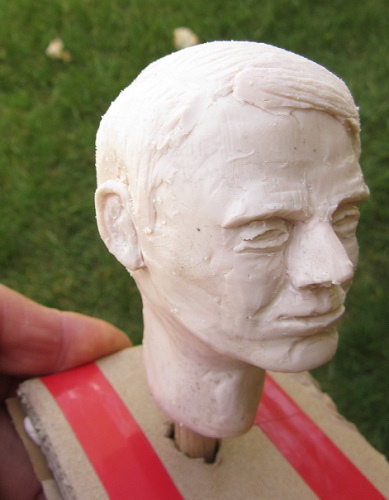
Its not yet finished.
Vincent (DB) |
|
| Revenir en haut de page |
|
 |
sebastian92
Serial Posteur


Inscrit le: 01 Sep 2015

Localisation: Hauts de seine
Âge: 62

|
 Posté le: 24/06/2021 14:32 Sujet du message: Posté le: 24/06/2021 14:32 Sujet du message: |
  |
|
|
Hello Vincent
sorry for my English spoken…
You are an "antic" builder, like to the original form of building of the beginning of Retroplane, initialized by the master Vincent Besançon ; so congratulation for your precise building of all your planes ![[amen]](images/smiles/amen.gif)
Marvelous building like the pioneers of the discipline ![[clap]](images/smiles/Clap.gif)
I like to see your work, continue for the details and solutions of your realizations ![[clap]](images/smiles/Clap.gif)

Pourvu que ça vole, roule, flotte ! normalement j'ai tout bien fait pour…
Un bel avion est un avion qui vole bien ! Marcel Dassault
…………
Sebastian
••••••••••••••••••••
Vends module émission 2.4 ghz pour Futaba, Hitec TZ-FM + 2 récepteurs corona 8 voies (contact en MP)
•••••••••••••••••••• |
|
| Revenir en haut de page |
|
 |
bocorvin
Maniaco Posteur


Inscrit le: 17 Aoû 2015

Localisation: Hillegom
Âge: 79

|
 Posté le: 24/06/2021 14:50 Sujet du message: Posté le: 24/06/2021 14:50 Sujet du message: |
  |
|
|
Hello Sebastian,
Merci pour votre comment jolie!
Your English is very understandable, mine is also not perfect , but is the spirit of the Retrolpane forum that makes it all possible, thanks to Vincent Besancon (sorry I don't know how to put French word control  ) )
Amicalement,
Vincent (DB) |
|
| Revenir en haut de page |
|
 |
bocorvin
Maniaco Posteur


Inscrit le: 17 Aoû 2015

Localisation: Hillegom
Âge: 79

|
 Posté le: 02/07/2021 10:24 Sujet du message: Posté le: 02/07/2021 10:24 Sujet du message: |
  |
|
|
Hello everyone,
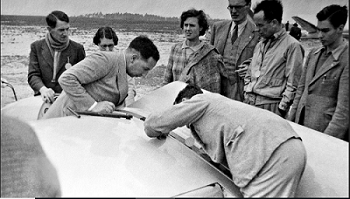
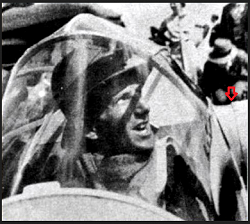
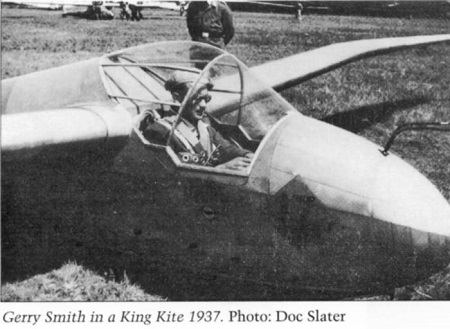
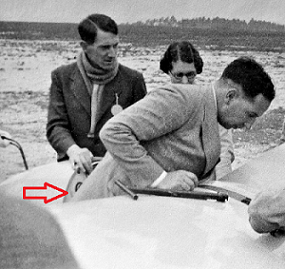
The instrument panel is, just like the pilot, well in sight. However, I had a problem, nowhere I could find information about it. On this photo I could see a tiny piece and there the panel seems to be white.
I also found a white panel on this photo of a Petrel, so it did occur. I decided to make something nice out of it, looking at the other gliders of Slingsby.
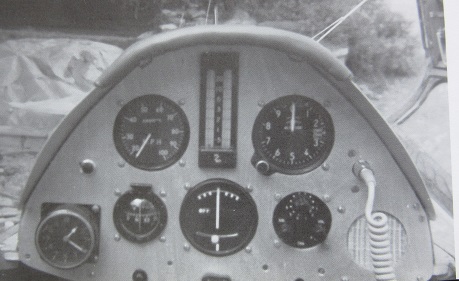
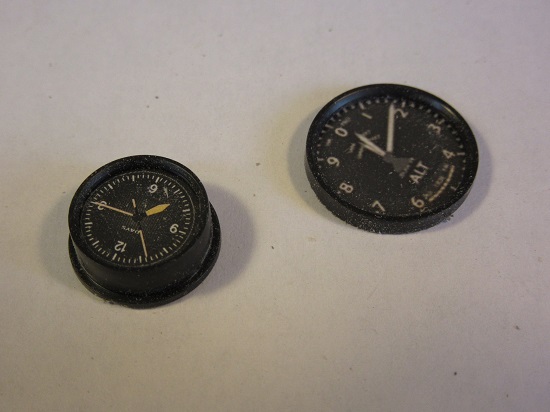
I had already ordered a set of instruments in 1:4 scale from Aero Cockpit, but I could not use the dials. I still had pictures of the dials from the previous plane, the Slingsby Gull. On the photo of the white instrument panel of the Petrel, the instruments were countersunk? and I decided to make something like this. The instruments from Aerocockpit were delivered as a superstructure, but that can be sawn off. On the photo on the right the sawn off altimeter and on the left the clock that was not sawn off.
. Now I could make the panel proper. It is made of two layers of 0.6 plywood, because that can still be cut. After having marked everything, I drilled all the holes with a 1mm drill, including the centre of the holes in the panels that were clamped together. After this, I cut the plywood on the front and back with a cutting compass, cut segments in it and could break out the plywood.
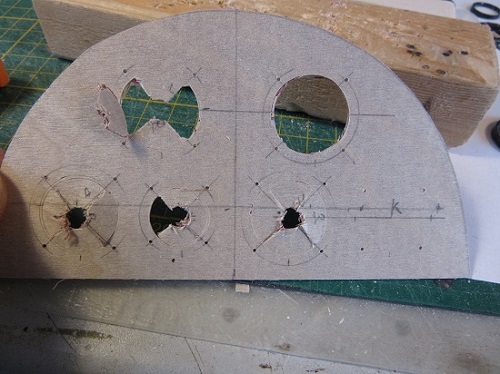
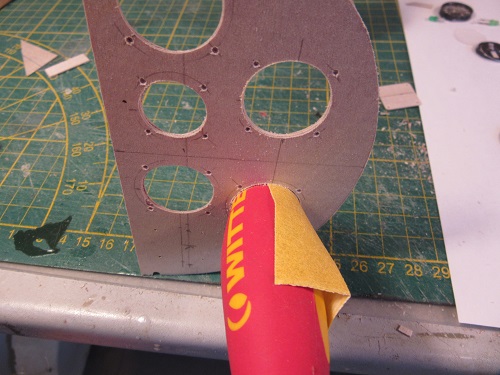
I glued the two panels together with a few dowel pins. Then it appeared that the holes were just a bit too small for the instruments and with the tapered handle of a screwdriver and some sandpaper I could make them fit exactly.
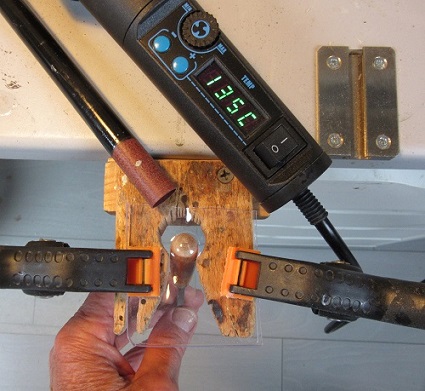
Now back to the instruments. I sawed off all the instruments that had been built up so that only the ring(bezel?) with the glass was left. But the compass should actually be a sphere. Eric spore had already done something like that, nice detail. I rounded off a handle of a file (I use everything within reach...), clamped a piece of PET on a board with a hole, heated the plastic, pushed the file up and a tube over it and lo and behold a nice sphere.
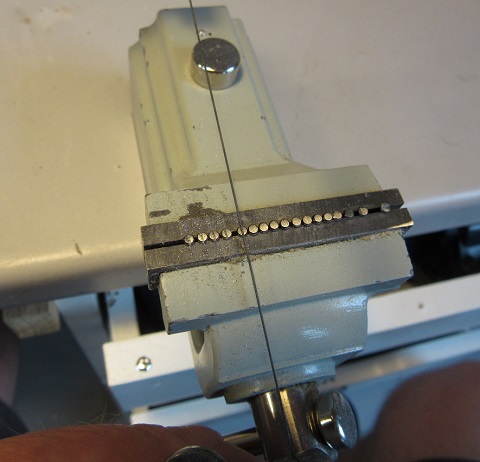
I glued a strip of a photo of the compass in it and painted the sphere black on the inside. I also made the screws from black pins, filed the heads flat and made a sawcut.
Now I had all the parts
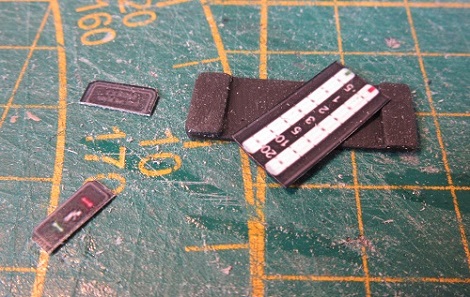
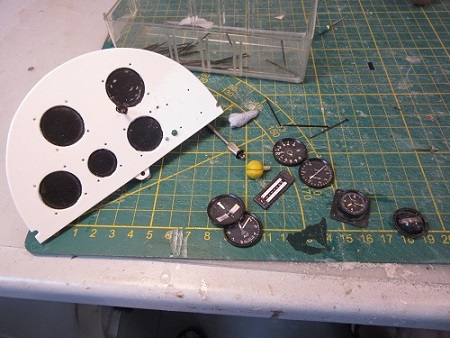
All was left was the fun part, gluing everything together with PVA
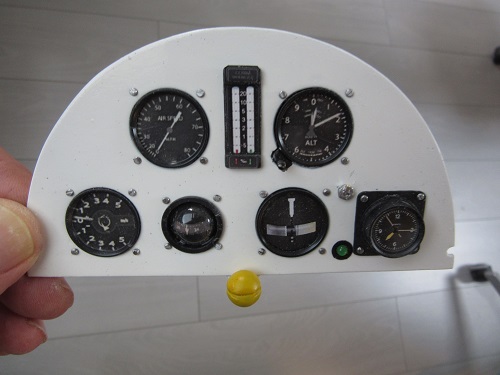
Vincent (DB) |
|
| Revenir en haut de page |
|
 |
Sed
Maniaco Posteur


Inscrit le: 13 Mai 2015

Localisation: Villeurbanne
Âge: 59

|
 Posté le: 03/07/2021 20:29 Sujet du message: Posté le: 03/07/2021 20:29 Sujet du message: |
  |
|
|
Hello Vincent,
Very nice job ![[amen]](images/smiles/amen.gif) ![[amen]](images/smiles/amen.gif) ! !
It is always very interesting all these details well illustrated by the photos ![[good]](images/smiles/good.gif) . .
The end is near!
Good continuation.

Serge |
|
| Revenir en haut de page |
|
 |
bocorvin
Maniaco Posteur


Inscrit le: 17 Aoû 2015

Localisation: Hillegom
Âge: 79

|
 Posté le: 09/08/2021 13:08 Sujet du message: Posté le: 09/08/2021 13:08 Sujet du message: |
  |
|
|
Thank you for your nice words Serge 
The instruments also include the pitot tube, which I like to be demountable. I made it from solid 2 mm wire, which I had lying around, I don't know exactly what kind of stuff, but it was not magnetic. I took two pieces, bent it to look like the example and soldered them together with silver.
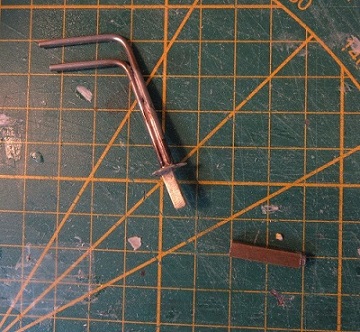
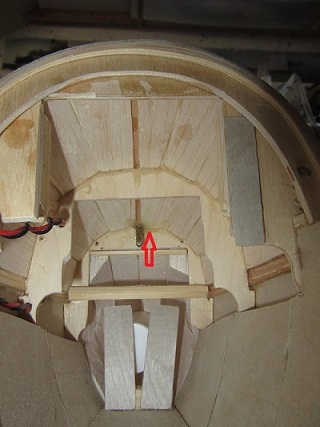
I left one piece of wire sticking out and put a triangular brass plate on it together with a square piece of brass. Finally a piece of iron nail and soldered it all together with silver. The brass profile fits into a somewhat larger profile, into which I glued a magnet. I glued the larger brass profile into the fuselage nose
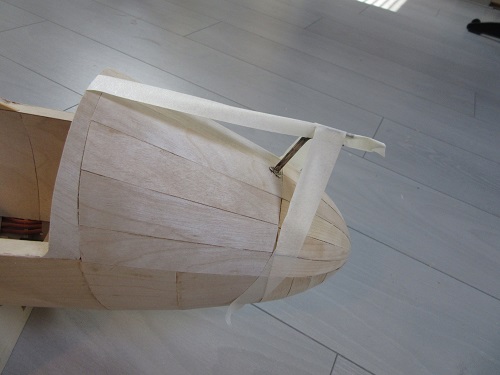
and glued it with 5 min epoxy from the inside. I had to hold the fuselage upside down and glue it in place, which keeps you flexible...
I hesitated with the skid, I decided to make the supporting structure massive. I glued 12 layers of 2mm balsa with PVA using the fuselage as mould, separating with cling foil.
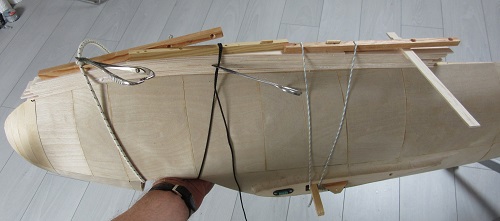
After curing, I took it off and planed it in the shape
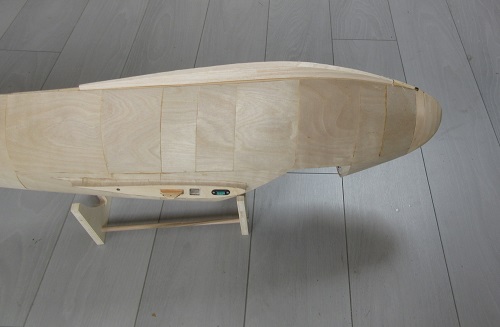
and covered it with Diacov, to imitate the sailcloth of the real glider. Then I painted it white and glued it all on the fuselage. On top of that I glued the skate itself made from 0.6mm plywood and two layers of 2mm pine. Then 2X2mm pine strips in the corners.
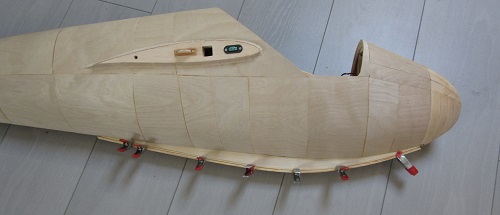
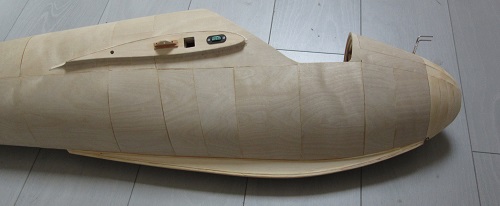
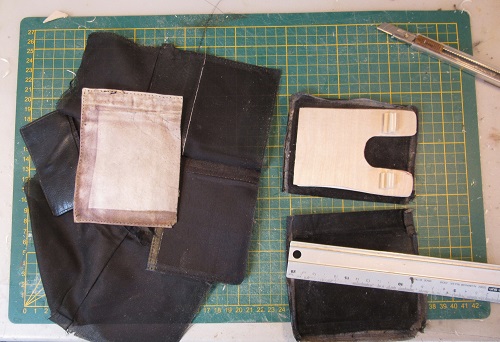
Back to the interior. I covered the seat with leather from an old wallet
and made a control stick from aluminium tube, which slides over a piece of installation wire
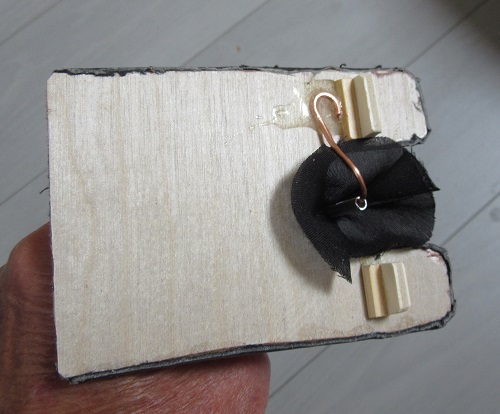
So that I can bend the stick in the desired position.
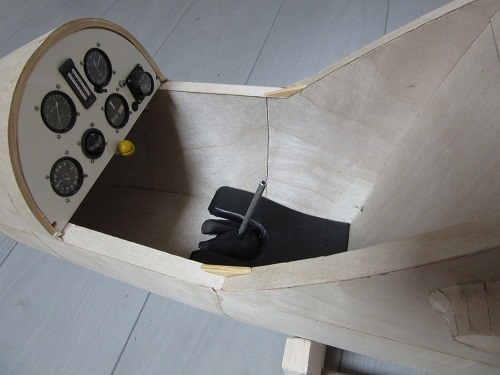
Some details still missing in the interior….
Vincent (DB) |
|
| Revenir en haut de page |
|
 |
de Schaetzen Harold
Maniaco Posteur

Inscrit le: 06 Avr 2006

Localisation: Schilde
Âge: 80

|
 Posté le: 09/08/2021 14:26 Sujet du message: Posté le: 09/08/2021 14:26 Sujet du message: |
  |
|
|
Dear Vincent,
As usual, an unbelieved construction.
Even a very smal detail is build similar to the real one.
Congratulation!
There is one detail that I would do differently.
I am afraid that the last piece of your skid will not be enough strong. Depending of your flying location.
I would us a light inox steel. Eventually painted.
Enjoy your trip to Retroplane 2021. Hopefully with good flying conditions.
Regards.
Harold |
|
| Revenir en haut de page |
|
 |
bocorvin
Maniaco Posteur


Inscrit le: 17 Aoû 2015

Localisation: Hillegom
Âge: 79

|
 Posté le: 09/08/2021 15:23 Sujet du message: Posté le: 09/08/2021 15:23 Sujet du message: |
  |
|
|
Dear Harold,
Thankyou for your nice comment!
About the skate, a strip of inox is surely to think about.
But... they didn't used that on real gliders, here is a photo I took from the Gull (same manufactory, same period) in the National Museum of Scotland there is only wood.
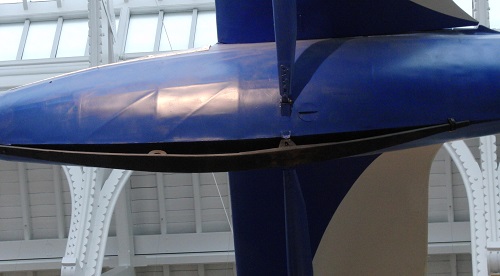
.
I lost the complete skate of my Gull during a groundloop in the start (which I abonded) on one of my first flights. It was the thick balsa piece which broke away from the fuselage. I could just glue the skate back 
So I think I leave it like this.
Yes I am looking forward to Retroplane 2021, hopefully with good flying conditions.
Regards,
Vincent (DB) |
|
| Revenir en haut de page |
|
 |
ManfredNeu
Accro Posteur


Inscrit le: 02 Jan 2009

Localisation: HalleWestfalen
Âge: 76

|
 Posté le: 09/08/2021 16:39 Sujet du message: Posté le: 09/08/2021 16:39 Sujet du message: |
  |
|
|
Ein grossartiger Bau ![[clap]](images/smiles/Clap.gif)  , Vincent. Ich hoffe, dass wir uns am Wochenende sehen werden. , Vincent. Ich hoffe, dass wir uns am Wochenende sehen werden.
Gruß
Manfred |
|
| Revenir en haut de page |
|
 |
bocorvin
Maniaco Posteur


Inscrit le: 17 Aoû 2015

Localisation: Hillegom
Âge: 79

|
 Posté le: 09/08/2021 17:34 Sujet du message: Posté le: 09/08/2021 17:34 Sujet du message: |
  |
|
|
Danke Manfred  , ja ich mir schon ans vorbereiten, Wetter sieht auch besser aus , ja ich mir schon ans vorbereiten, Wetter sieht auch besser aus 
Gruss,
Vincent (DB) |
|
| Revenir en haut de page |
|
 |
bocorvin
Maniaco Posteur


Inscrit le: 17 Aoû 2015

Localisation: Hillegom
Âge: 79

|
 Posté le: 07/11/2021 14:11 Sujet du message: Posté le: 07/11/2021 14:11 Sujet du message: |
  |
|
|
Bonjour a tous,
I'm a bit behind with my construction report, flying and working at the house...
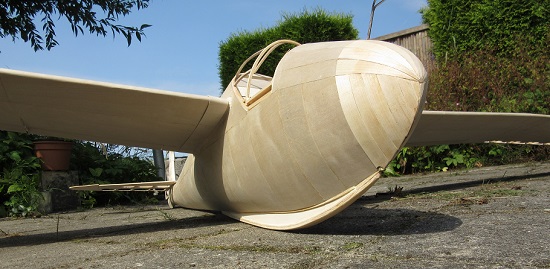
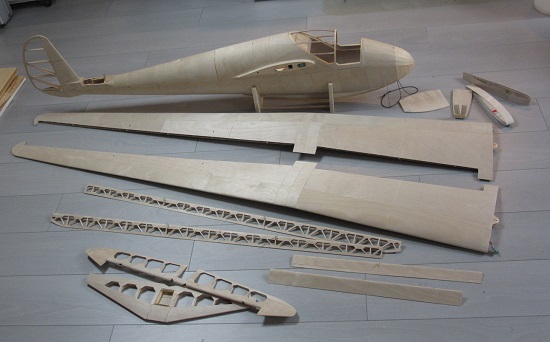
The structural work progressed well and with some sunshine I took some pictures outside
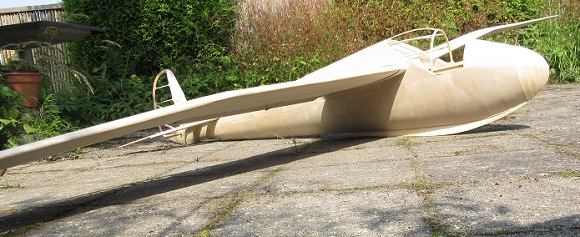
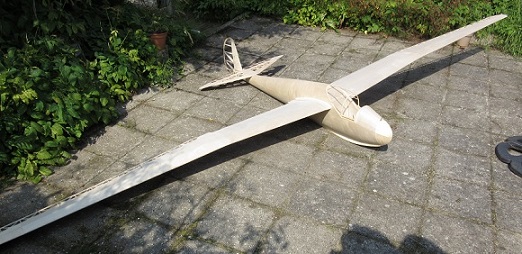
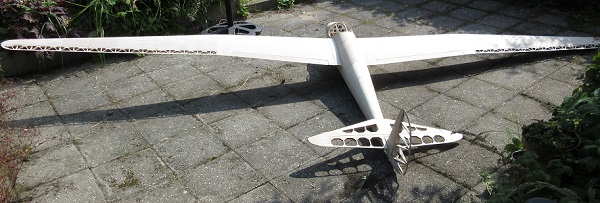
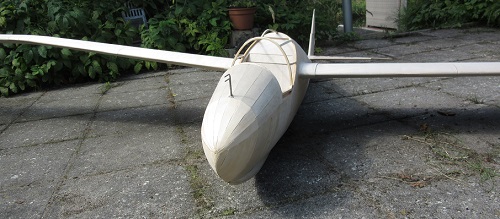
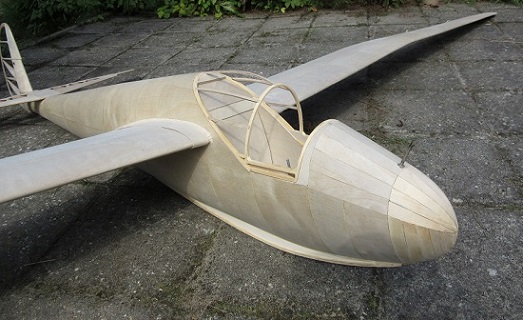
Here all parts ready for finishing
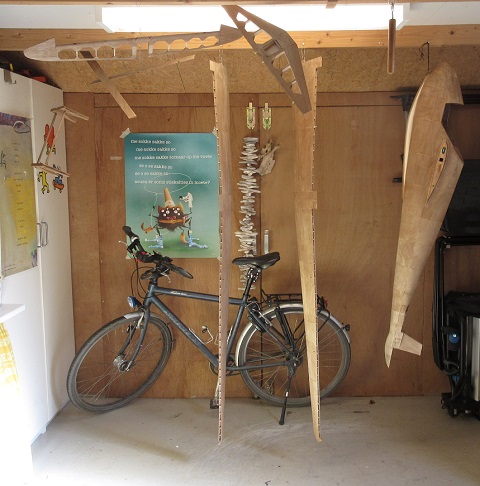
I applied bister (an organic water-soluble dye, available at the art materials store) with a sponge. Then I applied two layers of porienfuller and finishing it with PU yacht paint. The shed was full of it and it smelled quite bad
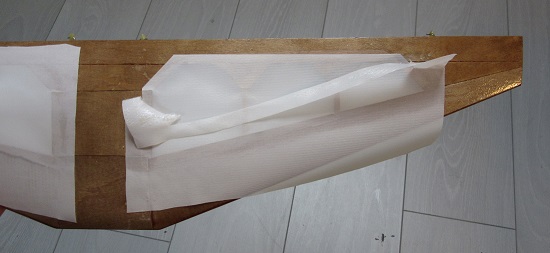
The horizontal stabiliser, rudder and ailerons were sheeted with Diacov
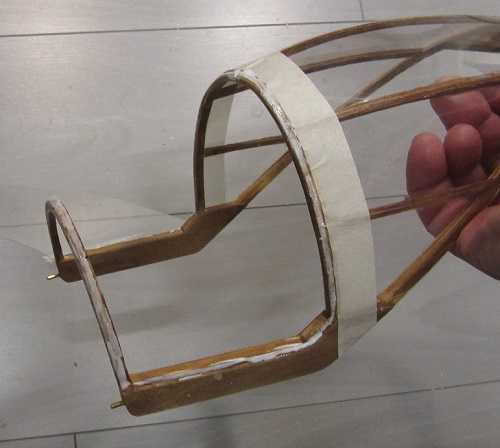
The cockpit canopy in the original was made of bent (perspex?) sheets over a wooden frame
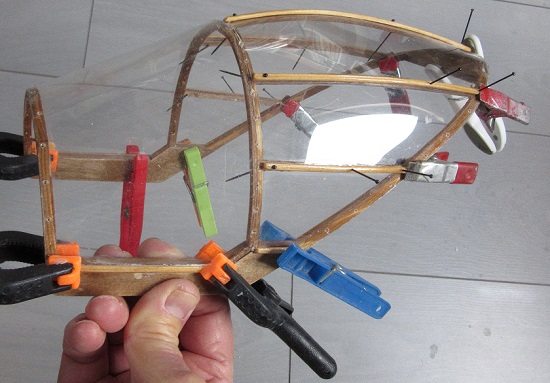
I glued 0.5mm transparent plastic panels with canopy glue on the frame, two panels at the same time, finishing with the big front panel.
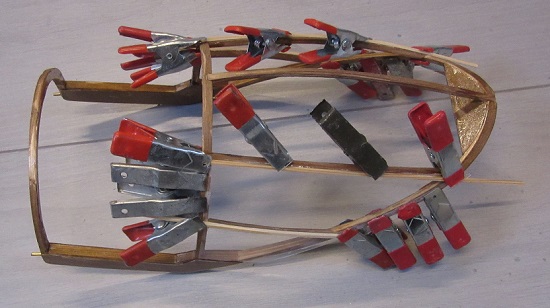
And also cover strips over the fore aft seams
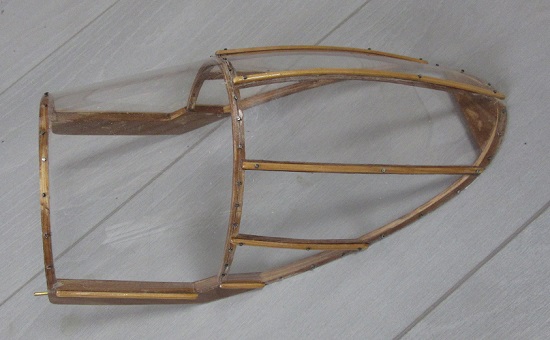
Not to forget very small "screws", pins with a sawcut I the head. (just as I made for the instrument panel)
Except for some finishing of the interior, it was ready now. I had calculated the centre of gravity with Ecalc and it had to be 79 to 90 mm from the LE. As the fuselage is too wide for my new digital CG scale, I got my old contraption from the attic, 3 sheets of plastic coated chipboard screwed together in a sort of U
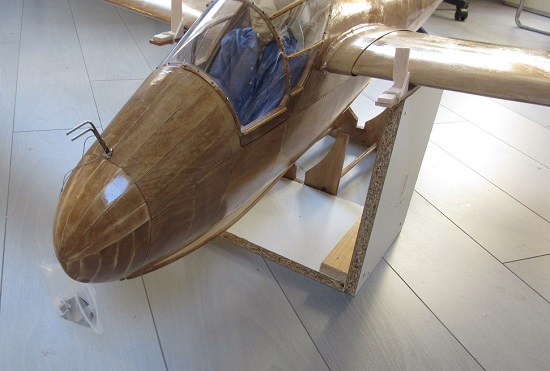
The wings are on slats with a 2X2 mm rounded slat (see arrow)
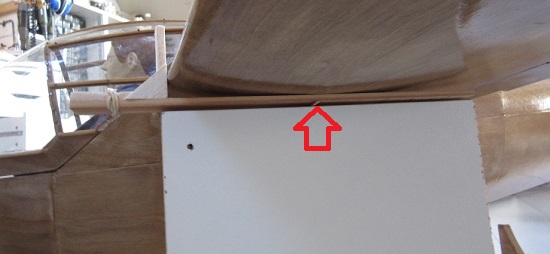
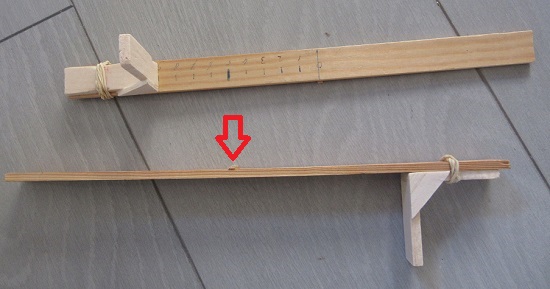
where the plane balances on. I had to use 450 gr lead, of which 130 gr can be removed. I put that in the white jar
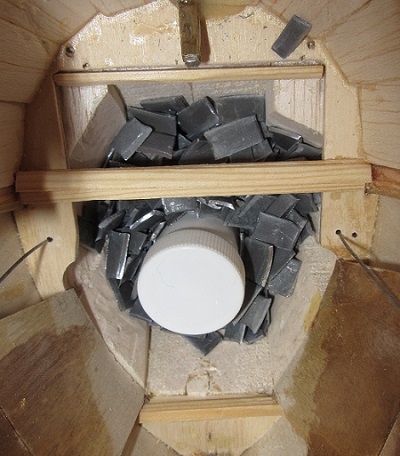
. In this way I can adjust the CG between the two values without chopping or breaking. I poured epoxy resin over the loose lead pieces (although I deducted the weight of the epoxy). Some more data of the model, span 3875mm, weight 4800 gr, wing area 85dm2 and that gives a wing loading of 56.4gr/dm2
I made some pictures in the sun.
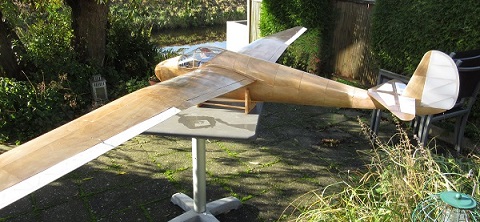
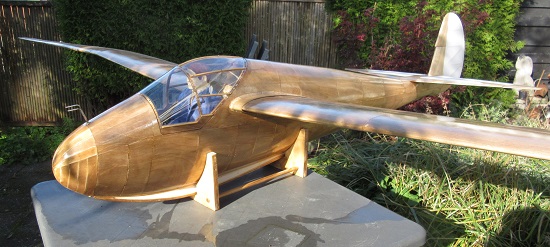
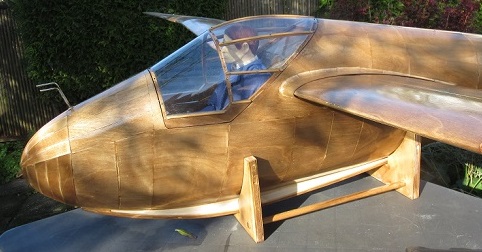
It is now almost ready to fly, just some painting of the pilot, some details of the interior and the lettering on the outside.
Vincent(DB) |
|
| Revenir en haut de page |
|
 |
ChristianR
Psycho Posteur

Inscrit le: 07 Oct 2007

Localisation: Yzeure (Allier)
Âge: 76

|
 Posté le: 07/11/2021 14:30 Sujet du message: Posté le: 07/11/2021 14:30 Sujet du message: |
  |
|
|
![[clap]](images/smiles/Clap.gif) ![[clap]](images/smiles/Clap.gif) magnifique construction magnifique construction ![[amen]](images/smiles/amen.gif) |
|
| Revenir en haut de page |
|
 |
ThomasF
Psycho Posteur


Inscrit le: 16 Jan 2010

Âge: 66

|
 Posté le: 07/11/2021 18:41 Sujet du message: Posté le: 07/11/2021 18:41 Sujet du message: |
  |
|
|
Sehr schön, Vincent.
Dann viel Spass beim Fliegen, in diesem Jahr? ![[vol]](images/smiles/vol.gif)
Gruß
Thomas |
|
| Revenir en haut de page |
|
 |
sebastian92
Serial Posteur


Inscrit le: 01 Sep 2015

Localisation: Hauts de seine
Âge: 62

|
 Posté le: 07/11/2021 19:34 Sujet du message: Posté le: 07/11/2021 19:34 Sujet du message: |
  |
|
|
Bonsoir Vincent,
![[clap]](images/smiles/Clap.gif) c'est magnifique ! c'est magnifique !
et le poids final obtenu est vraiment top ![[good]](images/smiles/good.gif)
La finesse des ailerons… c'est dingue  on est + dans le vrillage avec cette surface on est + dans le vrillage avec cette surface 
Il commence à faire froid… mais le soleil est encore là pour un premier vol bientôt ?

Pourvu que ça vole, roule, flotte ! normalement j'ai tout bien fait pour…
Un bel avion est un avion qui vole bien ! Marcel Dassault
…………
Sebastian
••••••••••••••••••••
Vends module émission 2.4 ghz pour Futaba, Hitec TZ-FM + 2 récepteurs corona 8 voies (contact en MP)
•••••••••••••••••••• |
|
| Revenir en haut de page |
|
 |
Sed
Maniaco Posteur


Inscrit le: 13 Mai 2015

Localisation: Villeurbanne
Âge: 59

|
 Posté le: 07/11/2021 20:59 Sujet du message: Posté le: 07/11/2021 20:59 Sujet du message: |
  |
|
|
Bonsoir Vincent,
Superbe construction, il est magnifique ton Slingsby ![[amen]](images/smiles/amen.gif) ![[amen]](images/smiles/amen.gif) ! !
J'espère que tu vas trouver le temps de faire le 1er vol bientôt  . .
Allez, bons vols avec ce bel oiseau !

Serge |
|
| Revenir en haut de page |
|
 |
bocorvin
Maniaco Posteur


Inscrit le: 17 Aoû 2015

Localisation: Hillegom
Âge: 79

|
 Posté le: 07/11/2021 22:34 Sujet du message: Posté le: 07/11/2021 22:34 Sujet du message: |
  |
|
|
Merci pour tous les comments positive, danke fur die Worte 
Sebastian; I am not sure what you mean with
"La finesse des ailerons… c'est dingue on est + dans le vrillage avec cette surface"
The ailerons are very narrow, I replaced the balsa ribs with spruce ones (its in the building report) and they are operated with two servo's simultaniously, so I can make some adjustments.
Hope to fly it before it really gets cold and windy. 
Ich hoffe noch im dieses Herbst zu fliegen
Vincent (DB) |
|
| Revenir en haut de page |
|
 |
Clifton
Psycho Posteur


Inscrit le: 06 Mai 2014

Localisation: Anjou
Âge: 63

|
 Posté le: 08/11/2021 11:04 Sujet du message: Posté le: 08/11/2021 11:04 Sujet du message: |
  |
|
|
Marvelous work, as usual ! ![[amen]](images/smiles/amen.gif)

Slingsby Petrel, à mon gout le plus beau de tous, quoi que le Fafnir ... Ah ces ailes en mouette, un jour ....
Rien de ce qui est fini n'est jamais achevé tant que tout ce qui est commencé n'est pas totalement terminé (Pierre Dac) |
|
| Revenir en haut de page |
|
 |
sebastian92
Serial Posteur


Inscrit le: 01 Sep 2015

Localisation: Hauts de seine
Âge: 62

|
|
| Revenir en haut de page |
|
 |
DOMINIQUE DIOT
Incurable Posteur


Inscrit le: 03 Nov 2013

Localisation: Somme
Âge: 72

|
 Posté le: 08/11/2021 12:44 Sujet du message: Posté le: 08/11/2021 12:44 Sujet du message: |
  |
|
|
Superbe construction ![[clap]](images/smiles/Clap.gif)

Lorsque on est encore en l'air, c'est qu'il est encore entier.
Dominique |
|
| Revenir en haut de page |
|
 |
Olli
Incurable Posteur


Inscrit le: 22 Juil 2006

Localisation: Germany
Âge: 58

|
|
| Revenir en haut de page |
|
 |
bocorvin
Maniaco Posteur


Inscrit le: 17 Aoû 2015

Localisation: Hillegom
Âge: 79

|
 Posté le: 08/11/2021 17:06 Sujet du message: Posté le: 08/11/2021 17:06 Sujet du message: |
  |
|
|
Hi Olli, dake 
Das Blei mache Ich ganz einfach, Ich setze die Rumpf aufrecht, dan die Bleistucken "einwerfen" und dan 24Stunden lamineer epoxy eingiessen. In dieser fall nutzte Ich so 50 gram (dan auch 50 gram weniger Blei nutzen!)
Beim ausgiessen darfur sorgen das alle Bleistucken auch Harz bekommen.
Verziehung fur mein Deutsch, hoffentlich ist es klar.
LG
Vincent (DB) |
|
| Revenir en haut de page |
|
 |
|

